Why Does My Garage Door Opener Open But Not Close Automatically?
A garage door opener that functions in one direction but not the other presents a frustrating scenario. The convenience of automatically opening a garage door is significantly diminished when manual intervention is required for closure. This malfunction stems from a variety of potential issues, ranging from simple sensor misalignments to more complex problems within the motor or control circuitry.
Understanding the underlying causes of this behavior requires a systematic approach to troubleshooting. Ignoring the problem can lead to further complications and potential safety hazards. This article aims to provide a comprehensive overview of the common reasons why a garage door opener might open but fail to close automatically, along with practical steps to diagnose and resolve the problem.
The operational cycle of a typical garage door opener involves several interconnected components working in harmony. When the remote control or wall switch is activated to open the door, a signal is sent to the opener's control board. This board activates the motor, which then engages the drive mechanism (either a chain, belt, or screw drive) to lift the door along its track. Limit switches within the opener assembly determine the upper and lower travel limits of the door, ensuring it stops at the correct positions. The closing sequence essentially reverses this process. However, additional safety features come into play during the closing operation, most notably the safety sensors, which are designed to prevent the door from closing if an obstruction is detected.
The inability to close automatically often points towards a malfunction or obstruction within the safety systems or the closing sequence itself. This article will explore the most probable causes and offer guidance on how to identify and rectify them.
Safety Sensor Issues: The Primary Suspect
The most frequent culprit behind a garage door opener's inability to close automatically lies within the safety sensors. These sensors, typically located near the bottom of the door tracks on either side of the opening, are designed to detect obstructions in the door's path. They operate on a photoelectric principle, where one sensor emits an infrared beam that is received by the other sensor.
When the beam is uninterrupted, the control board receives a signal indicating that the path is clear, allowing the door to close. However, if an object or misalignment breaks the beam during the closing sequence, the sensors signal the control board to stop and reverse the door's direction, preventing potential injury or damage.
Several factors can interfere with the proper functioning of the safety sensors. Misalignment is a common issue. Over time, the sensors can be bumped, shifted, or simply vibrate out of alignment. Even a slight misalignment can prevent the beam from reaching the receiver, triggering the safety mechanism.
Dirty or obstructed sensor lenses represent another potential problem. Dust, dirt, cobwebs, and other debris can accumulate on the sensor lenses, blocking or distorting the infrared beam. This interference can trick the sensors into thinking an obstruction is present, preventing the door from closing.
Wiring problems can also affect sensor functionality. Loose or damaged wires connecting the sensors to the control board can disrupt the signal, leading to intermittent or complete failure. Rodent damage to the wiring is a relatively common occurrence.
To troubleshoot safety sensor issues, begin by visually inspecting the sensors. Ensure they are securely mounted and aligned with each other. Clean the lenses with a soft, dry cloth. Check the wiring for any signs of damage or looseness. Many garage door openers have indicator lights on the sensors that provide diagnostic information. These lights may flash or remain off if there is a problem. Consult the opener's manual for specific interpretations of the light signals. Realigning the sensors can often resolve closing issues. This typically involves loosening the mounting brackets, adjusting the sensor position until the indicator lights show a stable connection, and then tightening the brackets.
If the sensor alignment and cleanliness appear to be correct, inspect the wiring more closely. Look for any frayed, broken, or disconnected wires. Secure any loose connections and replace any damaged wiring.
Limit Switch Adjustments: Setting the Boundaries
Limit switches play a crucial role in regulating the travel distance of the garage door. These switches, located within the opener mechanism, define the upper and lower limits of the door's movement. They signal the motor to stop when the door reaches its fully open or fully closed position.
If the limit switches are improperly adjusted, they can prevent the door from closing completely or, conversely, cause it to reverse prematurely. An improperly set 'down' limit switch can make the opener believe the door has already reached the fully closed position, even if it is still slightly open. This will prevent the automatic closing function from engaging.
To check and adjust the limit switches, consult the garage door opener's manual. The adjustment procedure varies depending on the specific model. Generally, it involves locating the limit switch adjustment screws or dials on the opener unit. These screws or dials are typically labeled 'up' and 'down' or with corresponding arrow symbols.
Carefully turn the 'down' limit adjustment screw in small increments, usually in a clockwise direction to increase the closing distance. After each adjustment, test the door's closing function. Continue adjusting until the door closes completely and seals tightly against the floor. Avoid over-adjusting the limit switch, as this can cause the door to bind or strain the opener mechanism. After adjusting the limit switches, be sure to test the safety features to ensure they are still functioning correctly.
If the limit switches are excessively worn or damaged, they may need to be replaced. Replacement switches are typically available from garage door parts suppliers or online retailers.
Motor and Control Board Malfunctions
While safety sensor and limit switch issues are the most common causes of a garage door opener failing to close automatically, problems within the motor or control board can also be responsible. These malfunctions are often more complex to diagnose and may require professional assistance.
The motor provides the power to operate the garage door. Over time, the motor can wear out, overheat, or develop internal faults. A failing motor may exhibit symptoms such as reduced power, unusual noises, or intermittent operation. If the motor is struggling to close the door, it may not be able to overcome the door's weight or any resistance in the tracks, causing the opener to stop before the door is fully closed. Similarly it might cause the door not to close automatically because the system detects this as a fault.
The control board is the brains of the garage door opener. It receives signals from the remote control, wall switch, and safety sensors, and controls the motor and other functions. A malfunctioning control board can cause a wide range of problems, including the inability to close the door automatically. For example a faulty relay on the control board might not be activating the closing sequence.
Diagnosing motor and control board issues often requires specialized knowledge and equipment. A multimeter can be used to test the motor windings and check for voltage at the control board terminals. Visual inspection of the control board may reveal burnt components or loose connections. However, attempting to repair these components without proper training can be dangerous.
If you suspect a motor or control board malfunction, it is generally recommended to consult a qualified garage door technician. They can accurately diagnose the problem and recommend the appropriate repair or replacement options.
In addition to these primary causes, other factors can occasionally contribute to a garage door opener's inability to close automatically. Track obstructions, such as debris or bent sections, can impede the door's movement and prevent it from closing fully. A worn-out or broken spring can also make it difficult for the motor to lift and lower the door smoothly. Furthermore, interference from other electronic devices can sometimes disrupt the opener's radio frequency signals.
Regular maintenance, including lubricating the moving parts, inspecting the tracks, and testing the safety features, can help prevent many of these problems. Addressing any issues promptly can prevent them from escalating into more serious and costly repairs.

Garage Door Won T Close And Light Flashes How To Fix Easy

How To Troubleshoot A Garage Door The Home Depot

How To Release And Reset The Emergency Cord On A Garage Door

How To Fix Garage Door Sensors That Are Not Working

15 Reasons Why Your Garage Door Won T Open Or Close

When Your Garage Door Falls Automatic Solutions

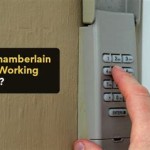
Liftmaster Garage Door Not Working Diy Solutions 2024

Why Does My Garage Door Open Again After Closing

6 Common Rollup Door Problems And How To Fix Them

How To Reset Your Garage Door Opener A Quick Guide
Related Posts