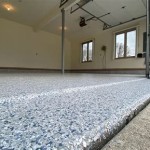
How To Prepare A Concrete Garage Floor For Painting

By | March 12, 2024

How To Prepare A Concrete Garage Floor For Painting

Painting a concrete garage floor enhances its appearance, protects against stains, and simplifies cleaning. Proper preparation is crucial for achieving a durable and attractive finish. These steps outline the process of preparing a concrete garage floor for painting.

1. Clean the Floor Thoroughly

Begin by removing all items from the garage, including vehicles, tools, and storage containers. A completely empty space allows for unobstructed cleaning and preparation. Sweep the floor to remove loose debris, dust, and leaves. A shop vacuum can be used for more thorough dust removal.

2. Degrease the Concrete

Grease and oil stains prevent paint adhesion. Apply a concrete degreaser following the manufacturer's instructions. A stiff-bristled brush can be used to scrub the degreaser into the concrete, focusing on areas with heavy staining. Rinse thoroughly with water and allow the floor to dry completely.

3. Repair Cracks and Imperfections

Inspect the floor for cracks, chips, and other imperfections. Small cracks can be filled with concrete patching compound. Larger cracks may require a more substantial repair using concrete mix. Follow the manufacturer's instructions for proper application and drying time. Once dry, any excess patching material can be sanded smooth with a concrete grinder or sandpaper.

4. Etch the Concrete

Etching prepares the concrete surface for optimal paint adhesion. An etching solution, typically muriatic acid or a phosphoric acid-based product, creates microscopic pores in the concrete. Follow the manufacturer's instructions for dilution and application. Apply the etching solution evenly using a watering can or sprayer, ensuring complete coverage. Allow the solution to work for the recommended time, then rinse thoroughly with water and allow to dry completely. Proper ventilation is essential during this process.

5. Address Efflorescence

Efflorescence, a white, powdery substance, sometimes appears on concrete surfaces due to mineral deposits. If present, scrub the affected areas with a stiff brush and a solution of water and white vinegar. Rinse thoroughly and allow to dry. In severe cases, a specialized efflorescence remover may be required.

6. Fill Control Joints

Control joints are purposely placed gaps in the concrete to allow for expansion and contraction. These joints should be filled with a flexible sealant designed for concrete. This prevents paint from cracking in these areas due to movement. Apply the sealant smoothly and evenly, using a caulking gun. Remove any excess sealant before it dries.

7. Mask Adjacent Surfaces

Before painting, protect adjacent surfaces such as walls, baseboards, and door frames by masking them with painter's tape. This prevents unintended paint transfer and creates a clean, professional finish.

8. Apply a Primer

A concrete primer enhances paint adhesion and promotes a uniform finish. Choose a primer specifically designed for concrete and masonry surfaces. Apply the primer evenly using a roller or sprayer, ensuring complete coverage. Allow the primer to dry thoroughly according to the manufacturer’s instructions.

9. Choose the Right Paint

Select a paint specifically formulated for concrete floors. Epoxy paints offer excellent durability and chemical resistance, making them a suitable choice for garage floors. Acrylic latex paints are another option, providing good durability and easier application. Consider the desired finish, whether glossy, semi-gloss, or satin, based on personal preference and the level of sheen desired.

By following these steps, one can effectively prepare a concrete garage floor for painting, ensuring a long-lasting and visually appealing result. Proper preparation is key to successful paint adhesion and durability, resulting in a protected and enhanced garage floor surface.


How I Painted My Concrete Garage Floor

How I Painted My Concrete Garage Floor Before After True Value

How To Paint A Garage Floor Clean And

How To Paint A Garage Floor Clean And Scentsible

How To Paint Concrete Flooring Moving Com

How To Paint Concrete Flooring Moving Com

Painting Your Garage Floors Do S Dont

Painting Your Garage Floors Do S Dont Making Pretty Spaces Blog

Preparing Concrete Floors For

Preparing Concrete Floors For Coating

How To Paint Garage Floors With 1 Part

How To Paint Garage Floors With 1 Part Within The Grove

How To Paint A Garage Floor Clean And

How To Paint A Garage Floor Clean And Scentsible

How To Paint Your Garage Floor True Value

How To Paint Your Garage Floor True Value

Painting Your Garage Floors Do S Dont

Painting Your Garage Floors Do S Dont Making Pretty Spaces Blog

How To Coat A Garage Floor This

How To Coat A Garage Floor This Old House


Leave a Reply

Your email address will not be published. Required fields are marked *

How To Prepare A Concrete Garage Floor For Painting

By | March 12, 2024

How To Prepare A Concrete Garage Floor For Painting

Painting a concrete garage floor enhances its appearance, protects against stains, and simplifies cleaning. Proper preparation is crucial for achieving a durable and attractive finish. These steps outline the process of preparing a concrete garage floor for painting.

1. Clean the Floor Thoroughly

Begin by removing all items from the garage, including vehicles, tools, and storage containers. A completely empty space allows for unobstructed cleaning and preparation. Sweep the floor to remove loose debris, dust, and leaves. A shop vacuum can be used for more thorough dust removal.

2. Degrease the Concrete

Grease and oil stains prevent paint adhesion. Apply a concrete degreaser following the manufacturer's instructions. A stiff-bristled brush can be used to scrub the degreaser into the concrete, focusing on areas with heavy staining. Rinse thoroughly with water and allow the floor to dry completely.

3. Repair Cracks and Imperfections

Inspect the floor for cracks, chips, and other imperfections. Small cracks can be filled with concrete patching compound. Larger cracks may require a more substantial repair using concrete mix. Follow the manufacturer's instructions for proper application and drying time. Once dry, any excess patching material can be sanded smooth with a concrete grinder or sandpaper.

4. Etch the Concrete

Etching prepares the concrete surface for optimal paint adhesion. An etching solution, typically muriatic acid or a phosphoric acid-based product, creates microscopic pores in the concrete. Follow the manufacturer's instructions for dilution and application. Apply the etching solution evenly using a watering can or sprayer, ensuring complete coverage. Allow the solution to work for the recommended time, then rinse thoroughly with water and allow to dry completely. Proper ventilation is essential during this process.

5. Address Efflorescence

Efflorescence, a white, powdery substance, sometimes appears on concrete surfaces due to mineral deposits. If present, scrub the affected areas with a stiff brush and a solution of water and white vinegar. Rinse thoroughly and allow to dry. In severe cases, a specialized efflorescence remover may be required.

6. Fill Control Joints

Control joints are purposely placed gaps in the concrete to allow for expansion and contraction. These joints should be filled with a flexible sealant designed for concrete. This prevents paint from cracking in these areas due to movement. Apply the sealant smoothly and evenly, using a caulking gun. Remove any excess sealant before it dries.

7. Mask Adjacent Surfaces

Before painting, protect adjacent surfaces such as walls, baseboards, and door frames by masking them with painter's tape. This prevents unintended paint transfer and creates a clean, professional finish.

8. Apply a Primer

A concrete primer enhances paint adhesion and promotes a uniform finish. Choose a primer specifically designed for concrete and masonry surfaces. Apply the primer evenly using a roller or sprayer, ensuring complete coverage. Allow the primer to dry thoroughly according to the manufacturer’s instructions.

9. Choose the Right Paint

Select a paint specifically formulated for concrete floors. Epoxy paints offer excellent durability and chemical resistance, making them a suitable choice for garage floors. Acrylic latex paints are another option, providing good durability and easier application. Consider the desired finish, whether glossy, semi-gloss, or satin, based on personal preference and the level of sheen desired.

By following these steps, one can effectively prepare a concrete garage floor for painting, ensuring a long-lasting and visually appealing result. Proper preparation is key to successful paint adhesion and durability, resulting in a protected and enhanced garage floor surface.


How I Painted My Concrete Garage Floor

How I Painted My Concrete Garage Floor Before After True Value

How To Paint A Garage Floor Clean And

How To Paint A Garage Floor Clean And Scentsible

How To Paint Concrete Flooring Moving Com

How To Paint Concrete Flooring Moving Com

Painting Your Garage Floors Do S Dont

Painting Your Garage Floors Do S Dont Making Pretty Spaces Blog

Preparing Concrete Floors For

Preparing Concrete Floors For Coating

How To Paint Garage Floors With 1 Part

How To Paint Garage Floors With 1 Part Within The Grove

How To Paint A Garage Floor Clean And

How To Paint A Garage Floor Clean And Scentsible

How To Paint Your Garage Floor True Value

How To Paint Your Garage Floor True Value

Painting Your Garage Floors Do S Dont

Painting Your Garage Floors Do S Dont Making Pretty Spaces Blog

How To Coat A Garage Floor This

How To Coat A Garage Floor This Old House


Leave a Reply

Your email address will not be published. Required fields are marked *