Craftsman Garage Door Opener Troubleshooting: Decoding the Flashing Light
A flashing light on a Craftsman garage door opener can be a frustrating signal, indicating a problem that prevents the door from operating correctly. Understanding the meaning behind the flashes is crucial for effective troubleshooting and resolution. The light serves as a diagnostic tool, communicating specific issues that need to be addressed. This article will detail common causes of a flashing light, providing step-by-step guidance on how to diagnose and resolve these problems. It is important to prioritize safety when working with garage door openers, disconnecting the power source before undertaking any significant repairs.
The flashing light is often located on the motor housing of the garage door opener. The pattern of the flashes, such as the number of flashes or the color of the light, provides a specific error code. The user manual for the specific Craftsman model is the most reliable source for decoding these error codes. However, some general causes are common across various models. Without the manual, careful observation of the flashing pattern combined with basic troubleshooting steps can often lead to identifying the issue.
Understanding the Safety Sensors
One of the most frequent reasons for a flashing garage door opener light is a problem with the safety sensors. These sensors are located on either side of the garage door opening, near the floor. Their primary function is to detect obstructions in the door's path. If an object, or even misalignment of the sensors themselves, interrupts the infrared beam between the two sensors, the garage door opener will not close and the light will flash as a warning.
The first step in troubleshooting the safety sensors is to visually inspect them. Ensure that the lenses are clean and free of dirt, dust, cobwebs, or any other obstructions. Use a soft cloth to gently clean the lenses. Also, check the wiring connected to the sensors. Look for any signs of damage, such as frayed wires, loose connections, or corrosion. If any damage is found, the wiring should be repaired or replaced.
Misalignment is another common issue. The sensors need to be properly aligned so that the infrared beam from one sensor directly hits the receiver on the other sensor. Each sensor typically has a small LED indicator light that illuminates when the alignment is correct. If one or both of these lights are off or flickering, the sensors are likely misaligned. To realign the sensors, gently adjust their position until both LED lights are on and steady. In some cases, the mounting brackets for the sensors might be bent or loose, requiring adjustment or replacement.
If the sensors appear to be clean, properly wired, and correctly aligned, but the light continues to flash, further testing may be required. Disconnecting and reconnecting the sensors might help to reset them. If the problem persists, consider replacing the safety sensors altogether. They are relatively inexpensive and can be a common point of failure over time due to exposure to the elements and potential physical damage.
Addressing Issues with the Wall Control Panel
The wall control panel, typically located inside the garage, controls the operation of the garage door opener. Problems with the wall control panel can also result in a flashing light on the opener motor. These issues can range from simple battery problems to more complex wiring malfunctions.
Many wall control panels use batteries for operation. If the batteries are low or dead, the panel may not function correctly, triggering the flashing light on the opener. Replace the batteries in the wall control panel with fresh ones. Ensure the batteries are installed with the correct polarity, as indicated in the control panel's battery compartment.
After replacing the batteries, test the wall control panel. If the door still does not operate and the light continues to flash, the wiring connecting the wall control panel to the opener motor might be the source of the problem. Check the wires for any signs of damage, such as cuts, frays, or loose connections. The wires are usually connected to terminals on both the wall control panel and the opener motor. Make sure these connections are secure and that the wires are properly inserted into the terminals.
If the wiring appears to be intact, the wall control panel itself may be faulty. In some cases, the button on the panel may be stuck or damaged. Try pressing the button firmly and releasing it to ensure it is not stuck. If the button appears to be damaged, or if the panel still does not function after checking the wiring and batteries, consider replacing the wall control panel.
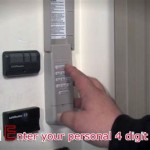
Some Craftsman garage door openers have a lock feature on the wall control panel. This feature, when activated, disables the remote controls and prevents the door from being opened remotely. If the lock feature is engaged, it can also cause the light to flash. Make sure the lock feature is disengaged by pressing and holding the lock button on the wall control panel until the light stops flashing.
Investigating Motor and Logic Board Problems
While safety sensors and the wall control panel are common culprits, more serious issues with the garage door opener motor or logic board can also cause the flashing light. These problems often require more advanced troubleshooting and may necessitate professional assistance.
The logic board is the brain of the garage door opener, controlling all of its functions. If the logic board malfunctions, it can cause a variety of problems, including a flashing light. Identifying a logic board issue can be challenging and often requires a process of elimination. Before suspecting the logic board, rule out all other potential causes, such as sensor problems, wall control panel issues, and wiring faults.
One possible indication of a logic board problem is erratic behavior of the garage door opener. This could include the door opening or closing unexpectedly, the light flashing randomly, or the opener not responding to any commands. In some cases, the logic board may be damaged by power surges or electrical storms. A visual inspection of the logic board may reveal signs of damage, such as burnt components or corrosion. However, in many cases, the damage is not visible and requires specialized testing equipment to diagnose.
The motor itself can also be the source of the problem. If the motor is failing, it might not provide enough power to open or close the door, triggering the flashing light. Listen for unusual noises coming from the motor, such as grinding, clicking, or humming sounds. These noises can indicate worn gears, a failing capacitor, or other motor issues. Check the motor's capacitor for any signs of bulging or leaking, which can indicate a capacitor failure.
Troubleshooting motor or logic board problems can be complex and potentially dangerous. Disconnecting the power to the garage door opener before attempting any repairs is absolutely essential. If the problem appears to be related to the motor or logic board, it is generally recommended to consult a qualified garage door technician. Replacing the motor or logic board requires specialized knowledge and tools, and improper installation can lead to further damage or safety hazards.
Beyond the primary components discussed above, other factors can contribute to the flashing light issue. Check the garage door springs for any signs of damage or breakage. Damaged springs can make it difficult for the motor to lift the door, triggering the safety mechanisms and the flashing light. Also, ensure that the garage door is properly balanced. A poorly balanced door can put excessive strain on the motor, leading to premature failure and the flashing light warning. Regular maintenance, including lubricating the door tracks and rollers, can help prevent these problems.
In summary, a flashing light on a Craftsman garage door opener is a diagnostic signal indicating a problem. Troubleshooting involves systematically checking the safety sensors, wall control panel, wiring, and potentially the motor and logic board. The specific flashing pattern, when cross-referenced with the user manual, provides valuable information for diagnosing the issue. While some problems can be resolved with simple repairs, others may require professional assistance. Prioritizing safety and following a systematic approach are crucial for effective troubleshooting and resolution.

How To Fix A Garage Door Opener That Won T Close The Lights Blink 10 Times

Troubleshooting For Garage Opener Light Blinking Blog

Troubleshooting Craftsman 1 2hp Garage Opener With 5 Blinking Lights Home Improvement Stack Exchange

Accessibility Tools

Troubleshooting Craftsman 1 2hp Garage Opener With 5 Blinking Lights Home Improvement Stack Exchange

Garage Door Lights Flashing Flickering Most Common Causes

Craftsman Garage Door Opener Error Codes Sears Partsdirect

Troubleshooting Craftsman 1 2hp Garage Opener With 5 Blinking Lights Home Improvement Stack Exchange

Troubleshooting Craftsman 1 2hp Garage Opener With 5 Blinking Lights Home Improvement Stack Exchange

What The Diffe Color Leds On A Garage Door Opener Mean
Related Posts