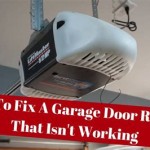
Why Does My Garage Door Opener Open But Not Close?
A garage door opener that functions properly when opening but fails to close presents a frustrating and potentially unsafe situation. Understanding the underlying causes of this malfunction is crucial for effective troubleshooting and repair. Several factors, both mechanical and electrical, can contribute to this common issue. A systematic approach to diagnosis is essential to identify the root cause and implement the appropriate solution.
The intricacies of a garage door opener system involve a complex interplay of components functioning in concert. When the door opens correctly but refuses to close, it indicates a specific disruption in the closing cycle. The opener's logic board, safety sensors, mechanical components like springs and rollers, and remote control systems all play vital roles in the closing operation. Any deviation from their intended function can lead to the observed malfunction.
Addressing this problem requires a thorough examination, beginning with the simplest potential causes and progressing to more complex possibilities. Overlooking basic checks can lead to unnecessary repairs or replacement of perfectly functional parts. A process of elimination is the most efficient method for isolating the source of the problem and determining the necessary corrective action. Safety precautions should be implemented whenever working with electrical and mechanical systems to prevent injury.
Safety Sensor Malfunctions: A Primary Suspect
The safety sensors, located near the floor on either side of the garage door opening, are commonly responsible for a garage door that opens but will not close. These sensors use an infrared beam to detect obstructions in the door's path. If the beam is interrupted, the opener is designed to prevent the door from closing, preventing potential damage or injury. This safety mechanism is mandated by law in many jurisdictions.
Several factors can cause the safety sensors to malfunction. Misalignment is a frequent cause. The sensors must be aimed directly at each other for the beam to be properly received. Even minor shifts in their position, due to accidental bumps or vibrations, can disrupt the beam and prevent the door from closing. Visual inspection is typically the first step in assessing sensor alignment.
Dirt and debris can also obstruct the sensor lens, interfering with the infrared beam's transmission and reception. Dust, cobwebs, or even condensation can accumulate on the lenses, causing the system to falsely detect an obstruction. Regularly cleaning the lenses with a soft, dry cloth ensures optimal performance and reduces the likelihood of false alarms.
Wiring issues are another potential cause of sensor malfunction. Loose connections, damaged wires, or corroded terminals can disrupt the electrical signal, preventing the sensors from functioning correctly. Careful inspection of the wiring and connections is essential to identify and address these problems. Replacing damaged wires or tightening loose connections can often resolve the issue.
Furthermore, in certain environments, sunlight interference can disrupt the sensor's infrared beam. Direct sunlight shining onto the sensor lens can overwhelm the sensor, causing it to malfunction. Shielding the sensors from direct sunlight or repositioning them can mitigate this problem.
Troubleshooting safety sensor problems involves several steps. First, visually inspect the sensors for proper alignment and obstructions. Clean the lenses with a soft cloth. Check the wiring and connections for damage or looseness. If possible, test the sensors with a multimeter to verify their functionality. If the sensors are confirmed to be faulty, replacement is typically the recommended course of action.
Limit Switch Adjustments: Regulating Door Travel
Limit switches are crucial components within the garage door opener that define the upper and lower limits of the door's travel. These switches tell the opener when to stop the motor at the fully open and fully closed positions. If the limit switch for the closing position is improperly adjusted, the opener may believe the door is already closed, preventing it from initiating the closing cycle.
The limit switches are typically small screw-like mechanisms located on the opener unit. Adjusting these screws modifies the point at which the motor stops. Overtightening or loosening these screws can cause the opener to malfunction. The adjustment process requires precision and careful calibration, typically following the manufacturer's instructions.
Incorrect limit switch settings can result from various factors. Wear and tear over time can cause the switches to drift out of adjustment. Accidental bumps or adjustments during maintenance can also alter the settings. Furthermore, power outages or surges can sometimes affect the opener's internal settings, including the limit switch positions.
To diagnose limit switch problems, carefully examine the switch settings. Consult the garage door opener's manual for the correct adjustment procedure. Slowly adjust the closing limit switch in small increments, testing the door after each adjustment. Be cautious not to overtighten the switch, as this can damage the mechanism. Observe the door's movement and stop adjusting when the door closes completely and smoothly.
If the limit switch is physically damaged or broken, it will need to be replaced. Replacement switches are typically available from hardware stores or garage door repair specialists. Ensure that the replacement switch is compatible with the specific garage door opener model.
Proper limit switch adjustment is essential for safe and reliable garage door operation. Regularly checking and adjusting these switches can prevent various problems, including the door opening but not closing. Implementing a preventative maintenance schedule ensures optimal performance and longevity of the garage door opener system.
Remote Control and Wall Switch Issues: Communication Breakdown
The remote control and wall switch are primary interfaces for operating the garage door opener. When the door opens but fails to close using these controls, it suggests a potential communication problem between the controller and the opener's receiver. This issue can stem from several factors, including battery problems, interference, or receiver malfunctions.
Weak or dead batteries in the remote control are a common cause of this malfunction. If the battery voltage is insufficient, the remote may not be able to transmit a strong enough signal to the opener. Replacing the batteries with fresh ones is the first step in troubleshooting remote control problems. Ensure that the batteries are correctly installed and that the battery compartment is clean and free of corrosion.
Radio frequency interference can also disrupt the communication between the remote and the opener. Other electronic devices operating on similar frequencies can block or interfere with the remote's signal. Common sources of interference include wireless routers, cordless phones, and other garage door openers in close proximity. Temporarily turning off potential sources of interference can help determine if this is the cause of the problem.
A faulty wall switch can also prevent the door from closing. Damaged wiring, a broken switch, or a loose connection can disrupt the signal to the opener. Inspect the wall switch for physical damage and ensure that the wiring is securely connected. Test the switch with a multimeter to verify its functionality. If the switch is faulty, it should be replaced with a new one.
The opener's receiver, which receives signals from the remote and wall switch, can also malfunction. Damage to the receiver's antenna or internal circuitry can prevent it from properly receiving and processing the signals. Inspect the antenna for damage and ensure that it is properly connected. If the receiver is suspected of being faulty, it may need to be replaced or repaired by a qualified technician.
Programming issues can also contribute to remote control problems. The remote may need to be reprogrammed to the opener if the code has been lost or reset. Follow the manufacturer's instructions for programming the remote to the specific garage door opener model. Ensure that the remote is within range of the opener during the programming process.
Troubleshooting remote control and wall switch issues involves a systematic approach. Start by replacing the batteries in the remote. Check for interference from other electronic devices. Inspect the wall switch for damage and wiring problems. If necessary, reprogram the remote to the opener. If these steps do not resolve the problem, the receiver may need to be inspected and repaired or replaced.

Garage Door Won T Close And Light Flashes How To Fix Easy

Garage Door Wont Close 4 Easy Fixes And Reasons Why The Is Not Closing

Garage Door Won T Open All The Way 10 Reasons Why

Craftsman Garage Door Opens But Won T Close Not Closing Fix Replace Main Circuit Board

How To Troubleshoot A Garage Door The Home Depot

Garage Door Remote Not Working 5 Most Common Reasons Why

15 Reasons Why Your Garage Door Won T Open Or Close

Garage Door Won T Close Allgood Company

Why Does My Garage Door Open Again After Closing

What To Do When Your Garage Door Does Not Open
Related Posts