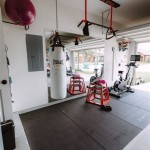
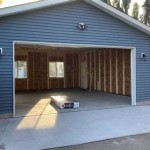
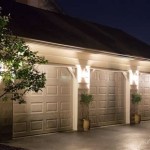
Transform Your Garage Into A Basketball Hoop
Creating a recreational space within a home's existing structure is often a cost-effective alternative to building a new addition or joining a sports facility. Transforming a garage into a basketball hoop area presents a viable option, offering a private and accessible space for practice, exercise, and leisure. This article outlines the key considerations, preparations, and installation steps involved in successfully converting a garage into a basketball court.
Assessing the Garage Space and Planning
The initial step involves a thorough assessment of the garage's dimensions and structural integrity. Standard single-car garages typically offer limited space, while double-car garages provide a more accommodating area for basketball activities. Crucially, the height of the garage ceiling significantly impacts the feasibility of installing a basketball hoop at regulation height. Standard basketball hoops are mounted ten feet above the ground, requiring a ceiling height exceeding this dimension to allow for optimal gameplay.
Furthermore, inspect the garage floor for any existing cracks, uneven surfaces, or other damage. Addressing these issues before installation is essential to ensure a safe and even playing surface. Consider the garage's existing electrical wiring and lighting. Adequate lighting is necessary for nighttime play, and modifications to the electrical system may be required to accommodate additional light fixtures. The garage door mechanism and its impact on the playing area should also be evaluated. Explore options for temporarily disabling or retracting the garage door during gameplay to maximize available space.
Once the physical space has been assessed, develop a comprehensive plan outlining the desired functionality of the basketball hoop area. Determine the type of basketball hoop to be installed (portable, wall-mounted, or ceiling-mounted), considering the available space and budget. A portable hoop offers flexibility in terms of positioning and storage, while wall-mounted and ceiling-mounted hoops provide greater stability and a more authentic basketball experience. The plan should also incorporate safety measures, such as padding for walls and support beams, to minimize the risk of injury.
Budgeting is an important aspect of the planning phase. Consider the costs associated with purchasing the basketball hoop, installation materials (e.g., mounting hardware, backboards, rims, nets), floor repairs, lighting upgrades, and safety padding. Obtain quotes from multiple suppliers and contractors to ensure competitive pricing.
Preparing the Garage for Conversion
Effective preparation is essential for a successful garage transformation. Begin by thoroughly cleaning the garage, removing all existing items and debris. This provides a clear workspace and allows for a more accurate assessment of the garage's condition.
Address any necessary floor repairs. Minor cracks can be filled with concrete patching compounds, while more significant damage may require professional repair services. Consider applying a sealant to the garage floor to protect it from moisture and wear. This can also provide a smoother and more durable playing surface. Epoxy coatings are a popular choice for garage floors, offering excellent resistance to chemicals, abrasion, and impact.
Enhance the garage lighting to ensure adequate visibility during gameplay. Consider installing additional overhead lights or spotlights to illuminate the basketball hoop area. LED lighting is an energy-efficient and long-lasting option. Evaluate the existing electrical wiring and ensure it can handle the additional load. If necessary, consult with a qualified electrician to upgrade the electrical system.
Protect the walls from damage during gameplay by installing padding. Foam padding, available in various thicknesses and sizes, can be attached to the walls using adhesives or screws. Pay particular attention to areas near the basketball hoop and any exposed support beams. Consider installing a backboard pad to further protect players from injury during rebounds and close-range shots.
Address the garage door mechanism to optimize the available playing space. Temporarily disabling the garage door opener and manually raising the door during gameplay can create additional headroom and prevent accidental activation of the door. Alternatively, consider installing a garage door with a higher track to maximize vertical clearance.
Installing the Basketball Hoop and Safety Measures
The installation process varies depending on the type of basketball hoop chosen. For portable hoops, assembly typically involves attaching the backboard, rim, and net to the base and filling the base with water or sand for stability. Follow the manufacturer's instructions carefully to ensure proper assembly and safe operation.
Wall-mounted basketball hoops require a more complex installation process. Locate the wall studs using a stud finder and mark the mounting points. Ensure that the wall studs are strong enough to support the weight of the basketball hoop and the forces generated during gameplay. Drill pilot holes into the studs and attach the mounting bracket using lag bolts. Securely attach the backboard, rim, and net to the mounting bracket.
Ceiling-mounted basketball hoops offer a professional-grade option but require specialized installation expertise. Identify the ceiling joists and ensure they are capable of supporting the weight of the basketball hoop. Attach the mounting bracket to the ceiling joists using lag bolts. A lift system may be required to raise and lower the basketball hoop to the desired height. Consult with a qualified contractor to ensure proper and safe installation.
After the basketball hoop is installed, conduct a thorough safety check to ensure that all components are securely attached and functioning correctly. Test the stability of the hoop by applying force to the backboard and rim. Verify that the net is properly attached and free from any obstructions. Inspect the floor for any potential hazards and address them accordingly.
Implement additional safety measures to minimize the risk of injury during gameplay. Install boundary lines using tape or paint to define the playing area and prevent players from running into walls or obstacles. Provide adequate lighting to ensure clear visibility. Encourage players to wear appropriate athletic footwear and protective gear, such as mouthguards and ankle braces. Establish clear rules and guidelines for gameplay to promote safe and respectful interactions.
Regularly inspect the basketball hoop and surrounding area for any signs of wear or damage. Tighten any loose bolts or screws, replace worn-out parts, and repair any damage to the floor or walls. Maintain the clarity of the floor surface by regularly sweeping or mopping to remove dust and debris.
By carefully planning and executing the garage transformation, homeowners can create a functional and enjoyable basketball hoop area that provides opportunities for exercise, recreation, and skill development. The resulting space not only adds value to the home but also fosters a healthy and active lifestyle.

How To Build Indoor Basketball Court For Gym Home Garage Integral Sports Systems

Garage Basketball Court Indoor This Is In A Ideas For

How To Attach A Basketball Hoop Garage Danley S Garages

Building A Custom Basketball Hoop In My Work

How To Attach A Basketball Hoop Garage Danley S Garages

Future Garage Basketball Hoop In 3rd Car

Turn Your Garage Into A Home Gym Hobby Room And More With These Clever Ideas

Transforming Your Garage Dual Purpose Car Storage And Basketball Court

Transform Your Garage Into The Perfect Man Cave More Space Place North Palm Beach

Basketball Garage Photos Ideas Houzz
Related Posts


