How to Replace an Automatic Garage Door Opener
An automatic garage door opener is a valuable convenience, adding security and ease to your daily life. But like any mechanical device, it can eventually wear out or malfunction. When this happens, replacing your garage door opener becomes necessary. This process can seem daunting, but with the right steps and understanding, it can be a manageable DIY project for many homeowners.
1. Understanding the Process
Replacing a garage door opener involves removing the old unit and installing the new one. The process generally includes these steps:
- Disconnecting the old opener from the power source and the garage door.
- Removing the old opener from its mounting bracket.
- Installing the new opener in the same location.
- Connecting the new opener to the power source and the garage door.
- Programming the new opener's remote control.
While this outline provides a general overview, specific steps and procedures will vary slightly depending on the model of your garage door opener. It's essential to consult the owner's manual for your specific model for detailed instructions and safety precautions.
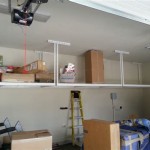
2. Preparing for the Installation
Prior to beginning the installation process, ensure you have the necessary tools and materials readily available. This includes:
- A ladder (if needed for reaching the opener)
- A screwdriver set (Phillips head and flat head)
- A wrench set (for securing mounting brackets)
- A level (for ensuring the opener is mounted straight)
- A drill (if necessary for mounting the opener)
- Safety glasses and gloves
- The new garage door opener, with all its components
Additionally, familiarize yourself with the owner's manual for the new opener. This manual will provide detailed instructions for installation and troubleshooting. It's also helpful to take pictures of the old opener's wiring configuration before disconnecting it. This can serve as a visual reference when connecting the new opener.
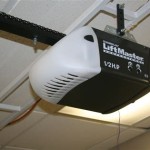
3. Removing the Old Opener
Begin by disconnecting the power to the old opener. This is typically achieved by flipping the circuit breaker to the garage door opener in your electrical panel. Once the power is off, you can start removing the old unit. The following steps will guide you through the process:
-
Disconnect the garage door from the opener:
This involves detaching the trolley arm from the door. The specific mechanism for this will vary depending on your opener model. Consult the owner's manual for instructions. -
Disconnect the wiring:
Carefully detach the wiring connecting the opener to the door, the power source, and the safety sensors. Take pictures of the wiring configuration for reference. Label the wires if needed. -
Remove the opener from its mounting bracket:
Unscrew the mounting bolts securing the opener to the ceiling or wall. Be careful not to damage the mounting surface or the surrounding area. -
Lower the door:
If the door was raised by the opener, carefully lower it and secure it with the manual release mechanism.
Remember to exercise caution during this process. Handle the opener and its components with care, and always be aware of potential hazards like falling objects or exposed wires. It's also important to keep children and pets away from the work area.
4. Installing the New Opener
With the old opener removed, you are ready to install the new one. This process involves the reverse of removing the old unit, but with specific considerations for the new model. Refer to the new opener's manual for detailed instructions, but generally, the steps are as follows:
-
Mount the new opener:
Position the new opener in the same location as the old one. Use the mounting brackets provided and ensure the opener is level. Use a drill if necessary to create new mounting holes. -
Connect the wiring:
Connect the wiring for the new opener to the power source, the door, and the safety sensors. Refer to the wiring configuration pictures you took of the old opener to ensure proper connections. Double-check all connections for security. -
Connect the garage door:
Attach the trolley arm to the door and ensure it's securely fastened according to the new opener's instructions. -
Test the opener:
Turn on the power to the opener and test its functionality. Ensure the garage door opens and closes smoothly and operates correctly. If the door does not operate properly, troubleshoot the connections and wiring.
During this process, ensure all the safety features like the automatic reverse mechanism and the safety sensors are working properly. These features are crucial for the safe operation of your garage door opener.
5. Programming the Remote Control
After installing the new opener and verifying its functionality, you need to program the remote control to work with the new unit. The programming process typically involves a sequence of button presses on the remote control and the opener's control panel. This process varies depending on the opener's model. Consult the owner's manual for detailed instructions on programming the remote control.
Once the remote control is programmed, test its functionality by opening and closing the garage door. Ensure the remote control operates reliably and consistently.
Replacing a garage door opener can be a satisfying DIY project for many homeowners. However, if you are uncomfortable with any aspect of the installation process or unsure about the steps involved, it is always best to consult a professional garage door technician. They can provide expert guidance and ensure the safe and correct installation of your new garage door opener.

Replace And Install A Genie Garage Door Opener Very Old

How To Fix A Garage Door That S Off Track Giel Doors

How To Install A Garage Door Opener

Re Attach Your Garage Door Opener

How To Replace Chamberlain Garage Door Opener

How To Change Garage Door Opener From Automatic Manual Mode

How To Automate A Roll Up Garage Door

All You Need To Know About Automatic Garage Door Openers A Guide For Homeowners Tom Repair

Can You Replace Your Own Garage Door Motor Mo Better

Need A Garage Door Opener Replacement What To Do Overhead Company Of Wilmington
Related Posts