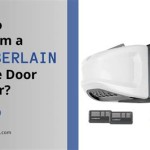
How to Program a Chamberlain, Universal, or Genie Garage Door Opener Remote
Programming a garage door opener remote can initially seem daunting, but understanding the process makes it significantly easier. Chamberlain, Universal, and Genie are leading manufacturers of garage door openers and their remotes. While each might have slight variations in the programming procedure, the underlying principles are largely the same. This article provides a comprehensive guide on programming these remotes to ensure seamless operation with your garage door.
Before starting the programming process, it is crucial to identify the type of garage door opener you have and the specific model of the remote. This information is typically found on the garage door opener motor unit itself and on the remote control. Knowing the model number will allow you to consult the manufacturer's website or owner's manual for precise programming instructions specific to your devices. This preemptive step will save time and effort by ensuring you are following the correct procedure from the outset.
The programming process generally involves synchronizing the remote's signal with the garage door opener's receiver. This synchronization is achieved through a combination of button presses on both the remote and the garage door opener unit. Understanding the location of the "Learn" or "Smart" button on the garage door opener unit is vital, as this button initiates the learning process. Similarly, knowing the function of each button on the remote is essential to successfully transmit the correct signal.
Furthermore, it's important to be aware of potential sources of interference that could hinder the programming process. Radio frequency interference from other electronic devices can disrupt the signal transmission between the remote and the opener. Ensuring a clear line of sight between the remote and the opener during programming can also improve the success rate. If encountering difficulties, temporarily disconnecting other nearby electronic devices might resolve the issue.
Understanding the "Learn" Button
The "Learn" button, also sometimes labeled as "Smart" or "Program," is a critical component in the remote programming process. This button is located on the garage door opener motor unit, typically on the back or side panel. Its appearance can vary depending on the manufacturer and model, often being a colored button (yellow, red, orange, green, or purple) or a small push-button switch. Referencing the owner's manual will definitively identify its specific location and appearance on your particular model.
When the "Learn" button is pressed, the garage door opener enters a learning mode, actively listening for a signal from the remote control. This mode typically lasts for a limited time, usually around 30 seconds. Therefore, it is crucial to be prepared to program the remote immediately after pressing the "Learn" button. Failing to program the remote within this timeframe will require re-pressing the "Learn" button to restart the learning process.
Color variations in the "Learn" button often indicate the security technology used in the garage door opener. Openers with yellow "Learn" buttons typically utilize Security+ 2.0 technology, while those with red or orange buttons often use older Security+ technology. Green or purple buttons usually denote rolling code technology. Understanding the color of your "Learn" button can help you determine the compatibility of replacement remotes and identify the correct programming sequence. While the basic principle remains the same, subtle differences may exist in the programming steps depending on the security technology employed.
Safety precautions should be observed when accessing the "Learn" button. Ensure the garage door is fully closed and the area around the opener is clear of obstructions. Disconnecting the power to the garage door opener before reaching near moving parts is always a prudent safety measure. Reconnect the power only after the programming process is completed. Never stand on unstable surfaces to reach the "Learn" button, and always use a sturdy ladder or step stool if necessary.
Programming Chamberlain and LiftMaster Remotes
Chamberlain and LiftMaster are sister companies, and their garage door openers often share similar programming procedures. Most Chamberlain and LiftMaster remotes utilize the "Learn" button method described earlier. The process generally involves pressing and releasing the "Learn" button on the garage door opener unit, followed by pressing and holding the button on the remote that you wish to program. The garage door opener light will usually flash, or you might hear a click indicating that the remote's signal has been successfully learned.
If you are programming multiple remotes, repeat the process for each remote individually. Ensure that you test each programmed remote after completion to verify that it correctly operates the garage door. In some instances, it may be necessary to press the remote button multiple times during the learning process to ensure proper synchronization. Refer to the owner's manual for specific guidance on the number of presses required for your particular model.
For Chamberlain and LiftMaster openers equipped with a wall control panel, some remotes can be programmed directly through the panel. This method typically involves entering a programming mode on the wall control panel and then following on-screen prompts to program the remote. This approach can be particularly useful when the "Learn" button on the motor unit is difficult to access.
Troubleshooting steps for Chamberlain and LiftMaster remotes include checking the remote's battery, ensuring that the remote is within range of the garage door opener, and verifying that the correct programming steps were followed. If the remote is still not functioning correctly, consider resetting the remote or the garage door opener to their factory defaults and attempting the programming process again. Resetting the devices can sometimes resolve conflicts or corrupted settings that are preventing proper communication.
Programming Universal and Genie Remotes
Universal remotes are designed to work with a wide range of garage door opener brands, including Chamberlain, LiftMaster, and Genie. Programming a universal remote often involves selecting the appropriate brand and model of your garage door opener from a list of pre-programmed codes. This selection process is typically accomplished through a series of button presses or by using a small dip switch located on the remote.
Genie remotes are designed specifically for Genie garage door openers, although some models may be compatible with other brands. Programming Genie remotes can involve a combination of the "Learn" button method and dip switch settings. Older Genie openers often utilized dip switches located on both the remote and the garage door opener unit. These switches needed to be set to the same configuration for the remote to function correctly. Modern Genie openers generally use the "Learn" button method in conjunction with rolling code technology, which provides enhanced security.
When programming a universal remote, it is essential to consult the remote's owner's manual for detailed instructions on selecting the correct code for your garage door opener. The manual will typically provide a list of codes corresponding to various brands and models. Follow the instructions carefully to enter the correct code into the remote's memory. After entering the code, test the remote to verify that it is functioning correctly. If the remote does not work, try a different code from the list until you find one that is compatible with your garage door opener.
Troubleshooting steps for universal and Genie remotes include verifying that the correct code has been entered, checking the remote's battery, and ensuring that the remote is within range of the garage door opener. If the remote is still not working, try resetting the remote to its factory defaults and attempting the programming process again. In some cases, it may be necessary to contact the remote manufacturer's customer support for assistance in finding the correct code or resolving technical issues.
For Genie openers that use dip switches, ensure that the switches on both the remote and the garage door opener unit are set to the same configuration. If the switches are not aligned, the remote will not function correctly. A small screwdriver or similar tool may be required to adjust the dip switches. Take note of the original switch positions before making any changes so that you can revert to the original settings if necessary.
Ultimately, successful garage door remote programming hinges on precise execution of the correct steps for your specific opener and remote models. Careful review of the manuals and methodical troubleshooting will resolve most programming challenges.

How To Program A Genie Universal Remote Chamberlain Liftmaster And More

How To Program The Chamberlain Klik5u Universal Remote Control

Genie Remote Control Programming Full

How To Program Chamberlain Universal Mini Remote Control

How To Program A Chamberlain Er Universal Remote Control Liftmaster 375

How To Program A Chamberlain Garage Door Or Gate Opener With Dip Switches Model Klik5u Bk2

How To Program A Chamberlain Universal Remote Genie Garage Opener

Mc100 P2 Universal Mini Garage Door Remote Chamberlain

How To Program Chamberlain S Universal Remote Control Model Klik3u A Garage Door Opener

Step By Guide To Programming Your Universal Garage Door Opener
Related Posts