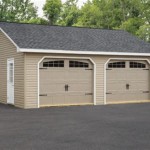
How to Build a Wood Garage Door Panel
Crafting a wood garage door panel is a rewarding DIY project that can enhance the aesthetics and functionality of your garage. While it may seem daunting initially, this step-by-step guide will empower you with the knowledge and techniques to create a sturdy panel that will withstand the elements and provide years of reliable service.
Materials Required:
- Plywood (1/2-inch or 3/4-inch thickness recommended)
- 2x4 lumber for framing
- Wood screws or nails
- Wood glue
- Primer and paint (optional, for customization)
Tools Required:
- Circular saw or table saw
- Drill
- Screwdriver or nail gun
- Measuring tape
- Carpenter's square
- Clamps
- Safety glasses and ear protection
Step 1: Determine Panel Size
Measure the height and width of the garage door opening where the panel will be installed. Subtract 1/2-inch from both measurements to allow for clearance on the tracks.
Step 2: Cut the Plywood
Using a circular saw or table saw, cut the plywood to the calculated dimensions. Ensure the edges are straight and square.
Step 3: Build the Frame
Cut the 2x4 lumber into two vertical pieces (called stiles) and two horizontal pieces (called rails). The stiles should be the same length as the panel height, and the rails should be the same width as the panel width.
Step 4: Assemble the Frame
Apply wood glue to the edges of the stiles and rails. Clamp the frame together, aligning the corners. Secure it with wood screws or nails. Countersink the fasteners slightly to avoid damaging the plywood when attached.
Step 5: Attach the Plywood
Position the plywood on top of the frame. Apply wood glue to the inside edges of the frame and the plywood. Clamp the plywood in place and secure it with screws or nails spaced evenly around the perimeter.
Step 6: Reinforce the Panel
Cut additional 2x4 lumber into diagonal braces. Position them inside the frame, extending from the corners to the center of the panel. Secure them with screws or nails.
Step 7: Finishing Touches
If desired, you can prime and paint the panel to protect it from moisture and enhance its appearance. Allow the paint to dry thoroughly before installing the panel.
Tips for Success:
- Use high-grade plywood for durability and resistance to warping.
- Drill pilot holes before driving screws to prevent splitting.
- Allow the wood glue to dry completely before applying any weight to the panel.
- If using nails, use galvanized or stainless steel nails to prevent rust.
- Inspect the panel regularly for any signs of damage or wear and make repairs as necessary.

How To Install Wood Panels On Garage Doors Customized

Resurface Your Garage Door With Modern Wood Panels

How To Install Wood Panels On Garage Doors Customized

How To Install Wood Panels On Garage Doors Customized

Update Your Curb Appeal In 30 Minutes With A Quick Garage Door Diy Using Garageskins Before After

Garage Door Sections Ddm Doors Blog Dan S

19 Homemade Garage Door Plans Diy Wooden Ideas

Garageskins Give You A Wood Look Without The Cost

Diy Faux Wood Garage Door Dana K Interior Design

Faux Wood Garage Door Tutorial Prodigal Pieces
Related Posts


