How to Install an Outdoor Garage Door Opener: A Comprehensive Guide
Installing an outdoor garage door opener presents a viable solution for specific scenarios where traditional, interior-mounted openers are impractical. These scenarios often include garages with limited overhead space, those constructed with unique architectural designs, or when increased interior headroom is desired. Outdoor openers, also known as jackshaft or wall-mounted openers, are mounted on the wall beside the garage door, directly driving the torsion bar. This method eliminates the need for a ceiling-mounted rail and motor, freeing up valuable space and offering a different approach to garage door automation.
However, installing an outdoor garage door opener is a project that requires careful planning, a solid understanding of mechanical and electrical systems, and adherence to safety precautions. Improper installation can lead to equipment malfunction, personal injury, or damage to the garage door and surrounding structure. This guide provides a comprehensive overview of the installation process, outlining the necessary steps, tools, and considerations for a successful and safe installation.
Key Point 1: Preparation and Safety Measures
Prior to commencing any installation work, thorough preparation is essential. This involves selecting the appropriate outdoor garage door opener model, gathering the necessary tools and materials, and taking all necessary safety precautions. Failure to adequately prepare can significantly increase the risk of errors, delays, and potential hazards.
Selecting the Right Opener: Choosing the correct outdoor garage door opener model is crucial for optimal performance and longevity. Factors to consider include the weight and size of the garage door, the frequency of operation, and the desired features, such as battery backup, remote access capabilities, and security features. Consult the manufacturer's specifications and guidelines to ensure compatibility with the garage door and its operating mechanism. Opting for a model specifically designed for outdoor use is paramount, as these are built to withstand varying weather conditions and potential environmental factors.
Gathering Tools and Materials: A comprehensive toolkit is indispensable for a smooth and efficient installation process. Essential tools include: * A level: Ensuring proper alignment is critical for smooth door operation. * Drill with various drill bits: For mounting brackets and securing hardware. * Socket set and wrenches: For tightening bolts and nuts. * Screwdrivers (Phillips and flathead): For various fastener types. * Wire strippers and crimpers: For electrical connections. * Multimeter: For testing electrical circuits. * Tape measure: For accurate measurements. * Safety glasses: To protect eyes from debris. * Work gloves: To protect hands from sharp edges and potential injury. * Ladder or step stool: To reach high areas safely.
Materials required typically include the outdoor garage door opener kit, mounting hardware (bolts, nuts, washers, lag screws), wiring connectors, and potentially additional wiring if the existing wiring is insufficient. It's advisable to have extra hardware on hand to address unforeseen circumstances or slight modifications that may be necessary during the installation.
Safety Precautions: Safety should be the foremost priority throughout the installation process. Before beginning any work, disconnect the power supply to the garage door opener circuit breaker. This is a critical step to prevent electrical shock. Use a voltage tester to confirm that the power is indeed off. Wear appropriate safety gear, including safety glasses and work gloves. Enlist the help of a second person, particularly when lifting and positioning heavy components. Familiarize oneself with the manufacturer's safety instructions and guidelines before starting the installation. Under no circumstances should work commence if the proper safety precautions haven't been taken.
Key Point 2: Mounting the Opener and Connecting Mechanical Components
The core of the installation process involves securely mounting the opener unit to the wall and connecting it to the garage door's torsion bar. This step requires precision and attention to detail to ensure proper functionality and prevent potential damage to the door or opener.
Locating the Mounting Position: Determining the optimal mounting location is crucial for efficient operation. Generally, the opener should be mounted on the wall adjacent to the torsion bar, ensuring it is level and securely anchored to a structural support. Consult the manufacturer's instructions for specific height and distance requirements. Mark the mounting holes accurately, using a level to ensure the opener will be properly aligned. Consider the location of existing electrical outlets and wiring to facilitate easy electrical connections.
Mounting the Opener Unit: Use appropriate mounting hardware, such as lag screws or bolts, to securely attach the opener bracket to the wall. Ensure that the hardware is adequately sized to support the weight of the opener unit. If mounting to drywall, locate and secure to wall studs for increased stability. Drill pilot holes before inserting the hardware to prevent splitting the wood. Double-check the alignment with a level before fully tightening the mounting hardware. A properly mounted opener is essential for smooth and reliable operation.
Connecting to the Torsion Bar: The connection between the opener and the torsion bar is critical for transferring the motor's power to the garage door. Follow the manufacturer's instructions meticulously when attaching the drive mechanism to the torsion bar. Ensure that the connection is secure and properly aligned to prevent slippage or binding. Some models may require specific adapters or couplings to ensure compatibility with the garage door's torsion bar. Incorrect installation can lead to inefficient operation, increased wear and tear on the opener, and potential damage to the garage door.
Adjusting and Fine-Tuning: Once the mechanical connections are made, carefully adjust and fine-tune the settings according to the manufacturer's instructions. This may involve adjusting the travel limits, tension settings, and other parameters to ensure smooth and safe operation. Pay close attention to any binding or resistance during operation and make necessary adjustments to eliminate any issues. Testing the door's movement throughout its full range of motion is crucial to identify and correct any potential problems.
Key Point 3: Electrical Wiring and Programming
Establishing the electrical connections and programming the opener are the final steps in the installation process. These steps require a basic understanding of electrical wiring and familiarity with the opener's programming interface. Improper wiring can pose a significant safety hazard, while incorrect programming can prevent the opener from functioning correctly.
Connecting the Power Supply: Ensure the power is still off before working with any electrical wires. Connect the opener's power cord to a dedicated electrical outlet or a junction box, following all applicable electrical codes and safety regulations. Use appropriate wiring connectors to ensure secure and reliable connections. If necessary, extend the existing wiring using appropriately sized wires and connectors. Grounding the opener is essential for safety, preventing electrical shock in the event of a fault. After wiring, ensure all connections are secure, and there are no exposed wires.
Wiring Safety Sensors: Garage door openers are equipped with safety sensors that prevent the door from closing if an obstruction is detected. These sensors are typically installed near the bottom of the garage door opening on either side. Wire the safety sensors according to the manufacturer's instructions, ensuring that the wires are properly connected and routed to the opener unit. Test the sensors to verify that they are functioning correctly. Malfunctioning safety sensors can create a dangerous situation, potentially causing injury or damage.
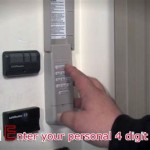
Programming the Opener: Once the electrical connections are complete, program the opener according to the manufacturer's instructions. This typically involves setting the travel limits, programming the remote controls, and configuring any additional features, such as battery backup or smart home integration. Refer to the opener's manual for specific programming instructions, as the process may vary depending on the model. Thoroughly test all programmed functions to ensure that the opener is operating correctly and safely. This includes testing the door's opening and closing functions, as well as the safety sensors and remote controls.
Testing and Verification: After the programming is complete, conduct a comprehensive test of the entire system. Open and close the garage door several times, paying close attention to its movement. Verify that the safety sensors are functioning correctly by placing an object in the path of the door while it is closing. Ensure that the remote controls are working properly and that the door responds to the commands. If any issues are identified during testing, troubleshoot the problem and make necessary adjustments. A properly installed and functioning outdoor garage door opener should operate smoothly, safely, and reliably.
By following these steps diligently and adhering to all safety guidelines, one can successfully install an outdoor garage door opener, providing a convenient and space-saving solution for automating garage door operation. Consistent maintenance and periodic inspections are crucial to ensure the continued safe and efficient operation of the opener.

How To Install And Wire Outdoor Light Fixtures Easy Home Diy Project

How To Install Outdoor Light Fixtures Replace Garage Lights

Remote Control Timed Light Re Purposed From A Garage Door Opener 4 Steps With Pictures Instructables

Garage Door Opener Guide The Home Depot

Finally A Silent Garage Door Opener That Locks Like Safe Rj0101

Garage Door Opener Guide The Home Depot

How To Install Outdoor Garage Lights Over The Moon

Garage Door Opener Installation At The Home Depot

How Much Does A Garage Door Replacement Cost 2024 Data Angi

Adding Trim To Our Garage Door
Related Posts