```html
How To Install A Replacement Garage Door
Replacing a garage door is a significant home improvement project that, while demanding, can be accomplished by a homeowner with a moderate level of DIY experience. This article provides a comprehensive guide on how to install a replacement garage door, covering essential steps, safety precautions, and necessary tools. It's crucial to note that working with garage doors involves heavy components and high-tension springs, presenting potential hazards. If unsure about any aspect of the installation, consulting or hiring a professional is strongly recommended.
Before commencing the installation, gather all necessary materials and tools. This upfront preparation streamlines the process and minimizes interruptions. Ensure the replacement door is compatible with the existing opening's dimensions. Double-check the measurements of the opening's width, height, and headroom. The headroom refers to the space between the top of the door opening and the ceiling. Inadequate headroom might necessitate modifications or a different type of door.
Verify the parts list provided with the new garage door kit. Common components include door panels, tracks (vertical and horizontal), rollers, hinges, springs (torsion or extension), cables, a mounting bracket or plate, a handle, and hardware (nuts, bolts, screws). The tools required typically encompass a level, measuring tape, socket wrench set, adjustable wrenches, pliers, screwdrivers (both Phillips and flathead), a hammer, safety glasses, work gloves, and a drill with various bits. A helper is highly advisable, especially when handling the heavy door panels and springs.
Key Point 1: Safe Disassembly and Removal of the Old Garage Door
The first and arguably most crucial step is the safe removal of the existing garage door. Safety is paramount during this stage, as improperly handled springs can cause severe injuries. Before dismantling anything, disconnect the garage door opener from the power source. Unplug the unit or turn off the corresponding circuit breaker.
For those with extension springs (typically located above the horizontal tracks), these springs are already under tension when the door is down. Secure the springs with C-clamps or locking pliers to prevent them from snapping back violently during disassembly. Wear safety glasses and gloves. Once secured, carefully detach the springs from the tracks and the door. If you are uncomfortable with this step, seek professional assistance. Torsion springs (usually mounted horizontally above the door) are far more dangerous and require specialized tools and expertise to unwind safely. It is strongly advised to call a professional for torsion spring removal.
After addressing the springs, disconnect the door opener arm from the door. Next, detach the cables from the bottom brackets of the door. These cables are connected to the springs and contribute to the door's lifting mechanism. With the springs and cables safely disconnected, detach the door sections from each other by removing the hinges that connect them. Start from the top section and work your way down. As each section is disconnected, have your helper assist in carefully lowering and removing it. These sections can be quite heavy.
Once all door sections are removed, detach the vertical and horizontal tracks. Unscrew or unbolt them from the wall and ceiling brackets. Remove any remaining hardware, such as the center support bracket (if applicable), and clear the opening of any debris or obstructions. Inspect the wooden frame around the opening for any rot or damage. If necessary, repair or replace damaged sections before proceeding with the new door installation. This will ensure a secure and stable mounting surface for the new tracks.
Key Point 2: Installing the Tracks, Rollers, and Door Sections
With the old door removed and the opening prepared, the next step involves installing the tracks for the new garage door. Refer to the manufacturer's instructions for specific measurements and placement guidelines. Typically, the vertical tracks are installed first. Position the tracks on either side of the opening, ensuring they are plumb (perfectly vertical) using a level. Secure the tracks to the wall with lag screws or bolts, depending on the wall construction. Use shims if necessary to ensure the tracks are perfectly vertical and aligned with each other.
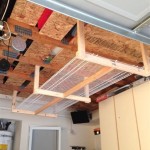
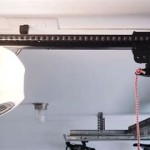
Next, install the horizontal tracks, which extend back into the garage. These tracks attach to the vertical tracks and are supported by ceiling brackets. Ensure the horizontal tracks are level and properly aligned with the vertical tracks. Use a level to check the horizontal tracks' pitch; they typically have a slight downward slope towards the back of the garage to facilitate smooth door operation. Secure the tracks to the ceiling joists with appropriate hardware. If the ceiling joists are not appropriately located, install wood blocking to provide a secure attachment point.
Before installing the door sections, attach the rollers to the hinges. The hinges are then attached to the door sections. The bottom section of the door usually has a bracket where the lifting cable will be attached. Securely fasten the hinges and brackets to the door sections according to the manufacturer's instructions. With the rollers and hinges installed on the door sections, begin assembling the door within the tracks. Starting with the bottom section, carefully insert the rollers into the vertical tracks. Have your helper assist in holding the section in place while you attach the next section above it. Repeat this process until all door sections are installed and connected.
As you assemble the door, ensure each section is properly aligned and the rollers move smoothly within the tracks. Check for any binding or resistance that could indicate a misaligned section or track. If necessary, adjust the track alignment or hinge positions to ensure smooth operation. This careful attention to detail will prevent premature wear and tear on the door and its components.
Key Point 3: Spring Installation and Cable Attachment
The installation of the springs is the most potentially hazardous part of the garage door installation. As mentioned previously, if you are uncomfortable with this step, it is best to hire a professional. The method for installing extension and torsion springs differs significantly. This section will briefly describe each, but note that detailed instructions will be provided by the manufacturer of the springs.
For extension springs, once the door sections are installed, attach the springs to the tracks and the bottom brackets of the door. Ensure the safety cables are properly threaded through the springs to prevent them from flying off in case of a spring failure. Adjust the spring tension to balance the door. The door should stay in place when raised halfway. If it drifts up or down, adjust the spring tension accordingly. Be extremely cautious when adjusting spring tension, as the springs are under considerable force.
For torsion springs, this process requires specialized tools and should ideally be performed by a trained professional. The torsion spring is mounted on a torsion tube above the door. The cable drums are attached to either end of the torsion tube. The cables are threaded through the cable drums and attached to the bottom brackets of the door. The torsion spring is then wound (tightened) using winding bars to create the necessary lifting force. This process requires precise measurements and careful execution to ensure the door is properly balanced and safe to operate.
Regardless of the type of spring used, ensure the lifting cables are properly routed through the pulleys and attached to the bottom brackets of the door. The cables should be taut and evenly tensioned. Check the cable connections and spring tension regularly to ensure the door continues to operate smoothly and safely. After the springs and cables are correctly installed, manually lift and lower the door to check its balance and operation. The door should move smoothly and effortlessly, without any binding or excessive resistance.
Finally, reconnect the garage door opener. Refer to the opener's manual for specific instructions. Adjust the opener's travel limits and force settings to ensure the door opens and closes fully without excessive force. Test the safety reversal system to ensure the door automatically reverses if it encounters an obstruction. This safety feature is critical for preventing accidents and injuries. Regularly inspect all components of the garage door system, including the tracks, rollers, hinges, springs, cables, and opener, to ensure they are in good working condition. Lubricate moving parts regularly to prevent wear and tear. By following these steps and taking the necessary precautions, a homeowner can install a replacement garage door effectively. If any doubt arises, seek guidance from a qualified professional to ensure a safe and successful installation.
```
How To Install A Garage Door

How To Install A Garage Door

How To Prepare Your Garage For A New Door Installation Better

How To Replace A Garage Door With Pictures Wikihow

10 Tips For How To Install A Garage Door Opener Family Handyman

How To Prepare For A New Garage Door Installation In Three Easy Steps Access Doors Corporate

Diy Garage Door Opener Replacement

Guide To Diy Garage Door Trim Replacement Mesa Doors

Detailed Garage Door Installation Instructions

Garage Door Installation All You Need To Know Victor
Related Posts