How To Hang Things In Your Garage: Maximizing Space and Organization
The garage, often relegated to a catch-all for unwanted items, possesses considerable potential for optimized storage and improved functionality. Effectively utilizing vertical space through hanging solutions represents a strategic approach to reclaiming floor space and creating a more organized environment. This article outlines the principles and methods for successfully hanging a variety of items within the garage, encompassing preparatory steps, hardware selection, and installation techniques.
Planning and Assessment: Foundation for Effective Garage Organization
Before installing any hanging system, a comprehensive assessment of the garage space is crucial. This assessment involves evaluating structural elements, identifying storage needs, and developing a detailed plan. Ignoring this preliminary stage can lead to inefficient use of space, unsafe installations, and ultimately, a frustrating and ineffective organization system.
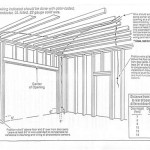
The first step involves a thorough inspection of the garage's structural integrity. Determine the wall construction: is it drywall over studs, concrete block, or bare studs? This identification dictates the appropriate type of mounting hardware required. For instance, drywall requires specialized anchors, while concrete necessitates the use of masonry screws and potentially, pre-drilled pilot holes. Locate the studs using a stud finder. Studs provide the strongest support and should be utilized whenever possible for hanging heavy objects. Walls constructed of concrete block require specific anchors designed to expand and grip the block's hollow core.
Next, analyze the types of items that need to be stored. Categorize items by weight, size, and frequency of use. Heavy items, such as bicycles or ladders, require robust hanging systems anchored directly to studs or concrete. Lighter items, such as garden tools or sporting equipment, can be hung on pegboards or lighter-duty track systems. Consider the dimensions of each item to ensure adequate clearance and prevent obstructions within the garage.
Finally, map out a tentative hanging plan. This plan should consider the available wall space, the location of outlets and light fixtures, and the potential for future expansion. Prioritize frequently used items, placing them within easy reach. Less frequently used items can be stored higher up or in less accessible locations. Utilize a sketch or digital floor plan to visualize the arrangement and optimize space utilization. This plan serves as a roadmap for the subsequent installation process, minimizing errors and ensuring a cohesive and functional storage system.
Selecting the Right Hardware: Ensuring Stability and Safety
Choosing the appropriate hardware is paramount for the safety and longevity of any garage hanging system. The type of hardware directly correlates to the weight of the items being hung and the wall construction. Employing inadequate or incorrect hardware can lead to system failure, potentially causing damage to property and posing a safety hazard.
For hanging items directly on drywall, several anchor options exist. Plastic wall anchors are suitable for lightweight items, such as picture frames or small tools. Metal toggle bolts provide a much stronger hold and are suitable for heavier items, such as shelves or tool racks. Self-drilling drywall anchors offer ease of installation and are suitable for medium-weight items. Regardless of the chosen anchor type, it is essential to follow the manufacturer's instructions regarding weight capacity and installation procedures. Always err on the side of caution and select anchors with a higher weight rating than necessary.
When attaching items to studs, wood screws provide the most secure connection. Select screws with sufficient length to penetrate deeply into the stud, typically at least 2 inches. Pre-drilling pilot holes is recommended, especially for hardwoods, to prevent the wood from splitting. For concrete walls, use concrete screws designed for masonry. These screws feature hardened threads that bite into the concrete, providing a strong and reliable hold. Pre-drilling pilot holes is essential when using concrete screws. The pilot hole should be slightly smaller than the screw's diameter to ensure a tight fit.
Beyond anchors and screws, consider the type of hanging apparatus. Hooks, brackets, and track systems offer various solutions for different storage needs. Heavy-duty hooks are ideal for hanging ladders, bicycles, and other large items. Brackets are useful for supporting shelves and work surfaces. Track systems provide a flexible and adaptable solution, allowing for easy adjustment and reconfiguration. Regardless of the chosen apparatus, ensure it is constructed from durable materials and has a weight rating that exceeds the weight of the items being hung. Choosing the right hardware is an investment in the safety and longevity of the garage organization system.
Installation Techniques: Executing the Hanging Plan
Proper installation is critical to ensure the stability and functionality of the chosen hanging system. Even with meticulous planning and the selection of appropriate hardware, improper installation can compromise the system's integrity and create potential safety hazards. Following established installation techniques is essential for achieving a secure and reliable storage solution.
When installing hooks or brackets directly into studs, use a stud finder to accurately locate the center of the stud. Mark the desired location with a pencil. Pre-drill a pilot hole slightly smaller than the diameter of the screw. This prevents the wood from splitting and makes it easier to drive the screw. Align the hook or bracket with the pilot hole and drive the screw in until it is snug but not over-tightened. Over-tightening can strip the screw or damage the wood. For concrete walls, use a hammer drill with a masonry drill bit to create pilot holes. Ensure the pilot hole is deep enough to accommodate the length of the concrete screw. Insert the concrete screw into the hole and tighten until it is snug. Avoid over-tightening, as this can damage the concrete.
When installing track systems, start by mounting the tracks securely to the wall. If possible, align the tracks with studs for maximum support. Otherwise, use appropriate drywall anchors or concrete screws. Ensure the tracks are level before tightening the screws. Once the tracks are installed, attach the hooks, brackets, or shelves to the tracks according to the manufacturer's instructions. The flexibility of track systems allows for easy adjustment and reconfiguration as storage needs evolve.
For heavier items, such as bicycles, consider using specialized hanging systems designed specifically for that purpose. These systems often feature multiple mounting points and adjustable straps or hooks to securely hold the bicycle. Always follow the manufacturer's instructions for installation and weight capacity. Regularly inspect the hanging system for any signs of wear or damage. Tighten any loose screws and replace any damaged components immediately. By adhering to proper installation techniques and performing regular maintenance, the garage hanging system will provide a safe, secure, and efficient storage solution for years to come.

How To Hang Stuff In Your Garage On The

7 Garage Wall Storage Tricks To Eliminate Clutter

Garage Organization That Gets Stuff Off The Floor Thrifty Decor Diy And Organizing

How To Hang Stuff In Your Garage On The Infarrantly Creative

How To Hang Stuff In Your Garage On The Infarrantly Creative

Garage Organizing How To Hang Bikes Scooters Ripsticks Balls More Creatingmaryshome Com

7 Garage Wall Storage Tricks To Eliminate Clutter

Garage Organization That Gets Stuff Off The Floor Thrifty Decor Diy And Organizing

How To Hang Stuff In Your Garage On The Infarrantly Creative

Garage Storage Ideas Hooks And Hangers
Related Posts


