How to Fix a Rough Concrete Garage Floor
A rough concrete garage floor can be a nuisance, making it difficult to maneuver furniture, park vehicles smoothly, and even creating a tripping hazard. Fortunately, fixing a rough concrete garage floor is a manageable DIY project, requiring minimal tools and materials. This article will outline the steps involved in smoothing out a rough concrete garage floor, transforming it into a more functional and aesthetically pleasing space.
1. Prepare the Concrete Surface
Before starting any repairs, it's essential to prepare the concrete surface properly. This includes cleaning and ensuring the floor is dry. Use a broom or shop vacuum to remove any debris, dust, or loose material. If there are any cracks or holes in the concrete, consider filling them with a concrete patching compound. Allow the patching compound to cure completely before proceeding.
Furthermore, ensure the concrete floor is dry before applying any smoothing agents. Moisture can hinder the bonding process and affect the final result. If the floor is damp, use a dehumidifier or allow it to dry naturally for several days.
2. Choose the Right Smoothing Agent
There are several options available for smoothing a rough concrete garage floor, each with its own advantages and disadvantages. Two popular choices are concrete resurfacers and epoxy coatings.
Concrete resurfacers are essentially a thin layer of concrete that is applied over the existing surface. They are typically a powdered mixture that is mixed with water and can be applied with a trowel. Resurfacers are a cost-effective option and can effectively smooth out minor imperfections. However, they may not be suitable for severely damaged or uneven floors.
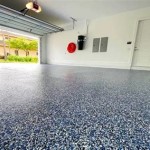
Epoxy coatings are a more durable and aesthetically pleasing option. They are a liquid compound that is mixed and applied in multiple layers. Epoxy coatings offer excellent adhesion, resistance to chemicals and stains, and a variety of color options. However, they are more expensive than resurfacers and require proper preparation to ensure a smooth, even finish.
3. Apply the Smoothing Agent
Once you've chosen your smoothing agent, follow the manufacturer's instructions carefully. The application process typically involves mixing the product according to the instructions and applying it evenly to the prepared concrete surface. Use a trowel or roller to spread the smoothing agent, ensuring even coverage and a smooth finish.
For concrete resurfacers, apply thin, even coats, allowing each coat to dry completely before applying the next. For epoxy coatings, apply multiple thin layers, ensuring proper curing time between each layer. The number of layers required will vary depending on the severity of the roughness and the desired finish.
4. Cure and Maintain
After applying the smoothing agent, allow it to cure completely according to the manufacturer's instructions. This typically involves avoiding any traffic or contact with water during the curing period. Curing time can vary depending on factors such as temperature and humidity.
Once the smoothing agent has cured, you can enjoy your newly smooth garage floor. However, proper maintenance is essential to maintain its functionality and appearance. Sweep or vacuum the floor regularly to remove dust and debris. For epoxy coatings, consider applying a sealant to enhance its durability and resistance to stains.

How To Fix A Concrete Garage Floor Diy Family Handyman

Easily Repair Your Pitted Or Spalled Garage Floor All Floors

Concrete Floor Repair Garage S Rawlins Paints

Easily Repair Your Pitted Or Spalled Garage Floor All Floors
How To Patch Paint A Very Pitted Floor

Applying On Rough Concrete 3 Useful Tips

Easily Repair Your Pitted Or Spalled Garage Floor All Floors

How To Fix Low Spots In Your Garage Floor All Floors

Best Ways To Repair Uneven Concrete Floors

Concrete Floor Repair Garage S Rawlins Paints
Related Posts


