How To Adjust the Height of a Garage Door
A garage door provides security, convenience, and protection from the elements. Its proper functioning is essential, and that includes its height. If a garage door doesn't close completely, it leaves the garage vulnerable to intrusion, pests, and weather damage. Conversely, if it closes too tightly or binds, it can strain the opener, leading to premature wear and potential component failure. Adjusting the height of a garage door is often a straightforward process that can be accomplished by a homeowner with basic tools and a good understanding of the system. This article provides a detailed guide on how to adjust the height of a garage door, ensuring proper operation and longevity.
Before commencing any adjustments, safety must be prioritized. Disconnect the garage door opener from its power source. This important step prevents accidental activation during the adjustment process, which could cause serious injury or damage to the door and its components. Wear appropriate safety gear, including safety glasses and work gloves. Garage doors are heavy and contain components under tension, such as springs, that require careful handling. Ensure the work area is well-lit and free of obstructions. Having a helper can also be beneficial, especially when dealing with heavier doors or more complex adjustments.
The first step in adjusting the height is to identify the reason for the misalignment. Several factors can contribute to a garage door closing too high or too low. These include: changes in the weather, which can affect the wood or metal of the door and frame; settling of the foundation, which can alter the alignment of the garage opening; problems with the limit switches on the garage door opener; and issues with the springs or cables. A thorough visual inspection of the door, tracks, rollers, springs, and cables can help pinpoint the cause of the problem. Look for signs of wear, damage, or misalignment.
Understanding Limit Switches
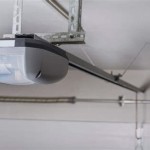
Limit switches are crucial components within the garage door opener mechanism. These switches communicate to the motor when the door reaches its fully open and fully closed positions. When the door reaches these points, the limit switches signal the motor to stop, preventing further travel. If the limit switches are improperly set, the door may not fully close (leaving a gap) or may close too far (binding against the ground). Modern garage door openers typically have electronic limit switches that are adjusted using buttons or dials on the opener unit. Older models might use mechanical limit switches with screws or tabs for adjustment.
To adjust electronic limit switches, locate the programming buttons on the garage door opener. Consult the opener's manual for specific instructions, as the procedure can vary depending on the manufacturer and model. Typically, one button is used to set the "up" limit, and another is used to set the "down" limit. To adjust the down limit, press and hold the appropriate button while observing the door's movement. Adjust the door's closing point in small increments until it closes fully without binding. Once the desired position is achieved, release the button and save the setting according to the manual's instructions. For mechanical limit switches, loosen the screws or tabs holding the switch in place and reposition it slightly. Test the door's operation after each adjustment and readjust as needed until the correct closure point is achieved.
It's important to make small, incremental adjustments to the limit switches. Over-adjusting can lead to the door travelling too far, potentially damaging the door or the opener mechanism. After each adjustment, test the door's operation by opening and closing it fully. Observe the door's movement carefully to ensure it travels smoothly and stops at the desired positions. If the door reverses direction unexpectedly, it could indicate a problem with the safety sensors or the limit switch settings. Refer to the opener's manual for troubleshooting guidance. Ensure that The Safety Sensors are correctly Aligned.
Adjusting the Track and Rollers
In some cases, the garage door's height issue might not be related to the limit switches but rather to the physical alignment of the track and rollers. The track guides the door's movement, and if it's bent, loose, or misaligned, the door may not close properly. Similarly, worn or damaged rollers can cause the door to bind or travel unevenly.
Begin by inspecting the tracks for any signs of damage or misalignment. Look for dents, bends, or loose mounting hardware. If the track is bent, it may be possible to straighten it using a rubber mallet and a block of wood. However, if the damage is severe, the track may need to be replaced. Tighten any loose mounting bolts or screws that secure the track to the garage frame. Ensure the track is plumb (vertically straight) and level (horizontally straight). Use a level to check the track's alignment and make adjustments as needed. If necessary, loosen the mounting hardware slightly to reposition the track and then retighten the hardware securely. Make sure both tracks are aligned with each other. Misalignment can cause scraping or binding.
Next, inspect the rollers for wear and tear. Rollers should move smoothly within the track without any resistance. If a roller is cracked, chipped, or binding, it should be replaced. To replace a roller, use a wrench to loosen the bolt or nut that secures the roller to the door bracket. Remove the old roller and install the new one, ensuring it's properly seated in the track. Tighten the bolt or nut securely. Repeat this process for all the rollers that need replacement. Consider lubricating both tracks and rollers periodically with a garage door lubricant to ensure smooth operation. Avoid using oil-based lubricants, as they can attract dirt and debris. Silicone-based lubricants are a better choice as they do not allow particles to stick easily and are long lasting.
Addressing Spring Tension
The garage door's spring system plays a crucial role in counterbalancing the weight of the door, making it easier to open and close. If the spring tension is not properly adjusted, the door may not close fully or may slam shut unexpectedly. Adjusting spring tension can be dangerous and should only be attempted by experienced individuals who understand the mechanics of garage door systems. If you're not comfortable working with springs, it's best to hire a qualified garage door technician.
There are two main types of garage door springs: torsion springs and extension springs. Torsion springs are mounted horizontally above the door, while extension springs are located on the sides of the door, running parallel to the track. The adjustment procedure varies depending on the type of spring. Torsion springs are adjusted by loosening the set screws on the spring cones and winding the spring using winding bars. Extension springs are adjusted by moving the S-hooks that connect the springs to the track. Adding tension will raise the door, while decreasing tension will lower the door. Only do this when the door is completely down.
Before adjusting any springs, ensure the garage door is fully closed and secured in place. Use clamps or locking pliers to prevent the door from accidentally opening during the adjustment process. When adjusting torsion springs, use the correct size winding bars and follow the manufacturer's instructions carefully. Be extremely cautious, as the springs are under high tension and can cause serious injury if not handled properly. Make small, incremental adjustments and test the door's operation after each adjustment. If unsure, seek the help of a trained professional.
After completing all the height adjustments, thoroughly test the garage door's operation. Open and close the door several times, observing its movement carefully. Ensure the door travels smoothly and stops at the desired positions without binding or reversing direction unexpectedly. Check the safety sensors to ensure they are functioning correctly. If the door encounters an obstruction during closing, it should automatically reverse direction. If the door fails to operate properly, re-examine the adjustments and make any necessary corrections. If problems persist, consult a qualified garage door technician for assistance. It is also important to review the garage door opener’s maintenance schedule to keep all the parts in good condition.

How To Adjust Your Garage Door Height

Adjusting Craftsman Garage Door Motor Height Travel Home Improvement Stack Exchange

Adjusting The Garage Door Height

Expert Guide To Garage Door Adjustment 2024 Tutorials

How To Fix Garage Door Gap Travel Adjustment

How To Adjust Your Garage Door Height

How To Adjust A Garage Door Close Completely

How To Adjust Garage Door Height A1 Doors

High Lift Garage Door Conversion

Chamberlain Liftmaster Travel Limit And Force Adjustment
Related Posts