If you are looking to give your home a fresh, updated look, consider installing a garage door overlay. Garage door overlays are an affordable and practical upgrade that can give any home an instant facelift. With just a few simple steps, you can transform your plain, outdated garage door into something that adds curb appeal and value.
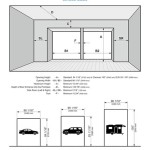
The first step in installing a garage door overlay is to measure your existing garage door. This will help you determine the size and shape of the overlay you will need for your particular door. It is important to measure both the width and height of your door as well as the depth and type of material it is made from. Once you have determined the size and shape of the overlay, you will be able to purchase the appropriate material.
The next step is to install the overlay. This process is relatively easy and can be completed in just a few hours. First, you will need to remove the existing door and prepare the surface for the overlay. Depending on the type of material your door is made from, you may need to sand and paint the surface before you install the overlay.
Once the surface is prepared, you will need to cut the overlay to fit your door. Most overlays come with a template that will help you make sure the overlay fits properly. Once the overlay is cut to size, you will need to attach it to your door. This can be done with either screws or adhesive. Some overlays require special hardware and tools, so make sure you read the instructions carefully before you begin.
The final step is to add the finishing touches. This can include painting the overlay to match your existing door or adding decorative trim or accents. Once the overlay is in place, you can enjoy the improved look of your garage door. Installing a garage door overlay is an easy and affordable way to upgrade the look of your home.


Related Posts


