Creating The Ultimate Garage Model In Revit
Revit, a Building Information Modeling (BIM) software from Autodesk, offers comprehensive tools for designing and documenting architectural projects. Modeling a garage within Revit, whether as a standalone structure or an integrated part of a larger residential project, requires a systematic approach to ensure accuracy, functionality, and visual appeal. This article outlines the steps and considerations involved in creating a meticulously detailed and functionally accurate garage model in Revit.
The initial phase of garage modeling involves defining the project parameters and establishing the base geometry. This sets the foundation for all subsequent modeling activities. The correct setup ensures coordinated design and facilitates the integration of various building elements.
Project Setup and Initial Geometry
Before initiating the garage model, a new Revit project should be created or the existing project should be opened if the garage is part of a larger building design. It's essential to define the project units (e.g., metric or imperial) and establish the project base point and survey point if working on a real-world location. Setting up the correct levels is also crucial. Levels represent defined elevations within the building, such as the garage floor level, the top of the foundation, and the roof height. Accurate level placement is fundamental for vertical coordination and accurate component placement.
Once the levels are established, the next step involves defining the garage's footprint using walls. Revit offers various wall types, including basic walls, curtain walls, and stacked walls. For a typical garage, basic walls are often sufficient. Prior to drawing the walls, it’s important to select an appropriate wall type with the correct thickness and material properties. The exterior walls of the garage should be modeled according to the intended dimensions and layout. Accurate dimensions are crucial for adhering to design requirements and building codes.
The garage floor should be modeled next. Floors in Revit are system families and can be created using the "Floor" tool under the "Architecture" tab. Similar to walls, selecting the correct floor type is important, considering factors such as thickness, material, and finish. The floor should be sketched within the confines of the garage walls. It’s advisable to align the floor edges with the wall’s interior face to ensure a clean and accurate connection.
After establishing the foundational elements – walls and floor – the roof should be addressed. Roofs in Revit can be created using various methods, including "Roof by Footprint," "Roof by Extrusion," and "Roof by Face." For a simple garage, a "Roof by Footprint" is generally the most straightforward approach. Similar to the other building elements, selecting the right roof type with the correct material and construction is important. The roof footprint should be sketched based on the desired roof shape and overhang. Defining the slope of the roof is critical to ensure proper drainage and aesthetic appeal. Revit allows for easy input of slope values, either as an angle or as a rise over run ratio.
Door and window placement adds functionality and aesthetic realism to the garage model. Revit provides a library of pre-loaded door and window families. The "Door" and "Window" tools are located under the "Architecture" tab. Selecting the appropriate door and window types based on size, style, and material is important. The doors and windows should be placed within the walls at the intended locations. Revit automatically creates cutouts in the walls to accommodate the doors and windows. Once placed, the door and window parameters, such as height, width, and sill height, can be adjusted to meet design specifications. Special attention should be paid to the garage door, which may require a specific type of door family that can be rolled up or sectioned.
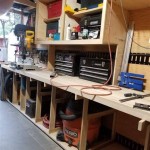
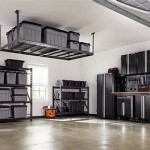
Interior elements, such as workbenches, shelving, and storage systems, enhance the usability and visual appeal of the garage model. These elements can be modeled using generic models or can be imported from Revit families libraries. Generic models offer flexibility in creating custom shapes and sizes. Pre-made families can save time and ensure consistency. The positioning of interior elements should be carefully considered based on the intended use of the garage space.
Adding Structural Components and Details
For enhanced realism and accuracy, incorporating structural components into the garage model is essential. This includes elements such as columns, beams, and foundation details. Structural components ensure that the model accurately represents the load-bearing elements of the structure.
Columns can be added using the "Column" tool under the "Structure" tab. Selecting the appropriate column type based on material (e.g., wood, steel, concrete) and size is important. The columns should be placed at strategic locations to support the roof and any other structural loads. Their base and top levels should align with the established levels within the project.
Beams provide horizontal support and can be modeled using the "Beam" tool, also under the "Structure" tab. Similar to columns, selecting the appropriate beam type based on material and size is crucial. Beams should be placed to span between columns or walls to support the roof structure. Ensure that the beams are properly aligned and connected to the supporting elements.
Foundation details are crucial for accurately representing the connection between the garage structure and the ground. This can include elements such as footings, foundation walls, and slabs. The "Wall Foundation" tool can be used to create footings beneath the exterior walls. The size and depth of the footings should be determined based on soil conditions and structural requirements. Foundation walls can be modeled using the "Wall" tool, ensuring they extend from the footing to the floor level. A concrete slab can be modeled as a floor element, providing a level surface for the garage floor.
Adding insulation is critical for energy efficiency and thermal performance. Revit allows the integration of insulation layers within walls, roofs, and floors. This can be done by editing the structure of the respective element types. Within the "Edit Type" dialog, the "Structure" parameter can be modified to include insulation layers with specified thicknesses and material properties. Accurate representation of insulation layers ensures that the model reflects the building's thermal characteristics.
Adding detailing to the garage model enhances its realism and accuracy for construction documentation. Detailing includes elements such as siding, trim, gutters, and downspouts. These details can be modeled using various Revit tools, including profiles, sweeps, and generic models. Siding can be applied to the exterior walls using the "Wall Reveal" or "Profile Sweep" tools. Trim can be added around doors and windows using the "Profile Sweep" tool. Gutters and downspouts can be modeled using generic models or pre-made families. Accurately detailing these elements improves the visual appeal and completeness of the model.
Visualization and Documentation
Rendering and documentation are crucial phases of the garage model creation process. Revit provides various tools for creating realistic visualizations and generating comprehensive construction documentation.
Revit offers built-in rendering capabilities and integration with external rendering engines. Realistic renderings can be created by assigning materials, adding lighting, and adjusting rendering settings. Materials can be assigned to various elements within the model to simulate their real-world appearance. Lighting can be added to illuminate the garage interior and exterior. Rendering settings, such as resolution and quality, can be adjusted to achieve the desired level of realism. High-quality renderings can be used for presentations, marketing materials, and design review.
Creating accurate drawings and schedules is essential for construction documentation. Revit automatically generates drawings, such as floor plans, elevations, sections, and detail views, based on the 3D model. Annotation tools can be used to add dimensions, text, and symbols to the drawings. Schedules can be created to extract information from the model, such as material quantities, door and window schedules, and room data. These drawings and schedules provide the necessary information for contractors to construct the garage accurately.
Effective collaboration and coordination are important when working on a BIM project. Revit facilitates collaboration through worksharing, allowing multiple users to work on the same model simultaneously. This enables architects, engineers, and contractors to collaborate efficiently. Coordination tools, such as clash detection, can be used to identify and resolve conflicts between different building systems. This improves the accuracy and constructability of the garage design.
By following these steps and incorporating these considerations, a comprehensive and meticulously detailed garage model can be created in Revit. This ultimately provides a valuable tool for design visualization, construction documentation, and collaborative project management.

Revit Custom Garage Tutorial 1

Revit Garage Building Section Basic Requirements

Advanced Revit Architecture 2024 Tutorial Parking Garage Ramps Using Floors

Revit Best Practices Customizing Components Garage Door Hayne Architects

Advanced Revit Architecture 2024 Tutorial Parking Garage Ramps Using Floors

How To Create A Revit Garage Door Family Shutter

Revit Tutorial Two Car Garage Mr Wellwood S Of Horrors

Schematic Design Model In Revit Tutorial Modern Barn Episode 02

Underground Parking Garage In Revit Tutorial

Designing Precast Concrete Parking Garages In Revit Arkance Lithuania
Related Posts