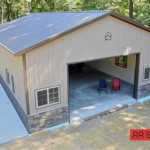
How to Build a Concrete Garage Slab
A well-constructed concrete slab is crucial for a durable and functional garage. This article provides a comprehensive guide to building a concrete garage slab, covering essential steps from site preparation to finishing.
Planning and Preparation
Careful planning and preparation are essential for a successful concrete pour. This phase involves several crucial steps:
- Obtaining Permits: Check local building codes and obtain the necessary permits before starting any work. This ensures compliance with regulations and avoids potential legal issues.
- Marking the Area: Accurately mark the perimeter of the slab using stakes and string lines. Double-check measurements to ensure accuracy.
- Excavation: Excavate the marked area to the required depth. The depth will depend on the local frost line and intended use of the garage. Consider contacting local utility companies to mark underground lines before digging.
Formwork and Base Preparation
Building robust formwork and preparing a stable base ensures a level and properly shaped slab:
- Building Forms: Construct formwork using 2x4 lumber or other suitable materials. Ensure the forms are straight, level, and securely braced to withstand the pressure of the concrete. Formwork should extend above ground level to the desired height of the finished slab.
- Compacting the Subgrade: Compact the excavated soil using a hand tamper or mechanical compactor. This creates a stable base that prevents settling and cracking of the slab.
- Adding Gravel Base: Add a layer of gravel, typically 4 to 6 inches thick, over the compacted subgrade. This layer improves drainage and provides a level surface for the concrete.
- Installing Vapor Barrier: Place a vapor barrier, such as 6-mil polyethylene sheeting, over the gravel base. Overlap the seams and extend the barrier up the sides of the formwork. This prevents moisture from migrating into the concrete.
Reinforcement
Reinforcing the concrete slab increases its strength and resistance to cracking:
- Installing Rebar: Place steel reinforcing bars (rebar) within the formwork. Use rebar chairs or other supports to keep the rebar elevated off the gravel base. The spacing and size of the rebar will depend on the structural requirements of the slab.
- Wire Mesh: Consider using welded wire mesh in addition to or instead of rebar for added reinforcement, particularly in areas with lighter loads.
Concrete Placement and Finishing
Proper concrete placement and finishing techniques are critical for a smooth and durable surface:
- Ordering Concrete: Order the correct amount of concrete from a reputable supplier. Ensure the concrete mix is appropriate for the intended application.
- Pouring Concrete: Pour the concrete evenly within the formwork. Use a shovel or rake to spread the concrete and ensure it fills all corners and around any embedded items.
- Screeding: Use a screed board to level the concrete surface. Move the screed back and forth across the formwork, resting it on the top edges.
- Floating: After screeding, use a bull float to further smooth the surface and embed any aggregate. This creates a more durable and aesthetically pleasing finish.
- Edging: Use an edging tool to create rounded edges along the perimeter of the slab. This prevents chipping and provides a cleaner look.
- Grooving or Broom Finishing: Create grooves in the surface using a grooving tool or create a textured surface with a broom to improve traction. This step is especially important for outdoor slabs to prevent slipping.
- Curing: Allow the concrete to cure properly by keeping it moist for several days. This can be achieved by covering the slab with plastic sheeting or by spraying it with water regularly. Proper curing is essential for achieving the desired strength and durability of the concrete.
Control Joints
Control joints help manage cracking in the concrete slab:
- Cutting Control Joints: Cut control joints into the concrete surface after it has begun to set but before it fully hardens. These joints create weakened planes where cracking can occur in a controlled manner, preventing random cracking.
- Spacing Control Joints: Space control joints at intervals no more than 2.5 times the thickness of the slab.
Post-Pour Considerations
After the concrete has cured, a few final steps are necessary:
- Form Removal: Carefully remove the formwork once the concrete has reached sufficient strength.
- Backfilling: Backfill around the perimeter of the slab with compacted soil.
- Sealing: Consider applying a concrete sealer to protect the slab from staining and moisture penetration. This is particularly important for garages that will be exposed to vehicles and other potential sources of stains.

Concrete Slab Base For Garage Diynot Forums

Concrete Slab Base For Garage Diynot Forums

How To Pour A Concrete Slab Diy Family Handyman

How To Build A Garage Ground Work And Concrete Pad

Diy Garage Slab How To Pour A Concrete

How To Manufacture A Garage Pad Easily

Step By Guide How To Pour A Concrete Slab For Metal Garage

Ideas For Building Concrete Garage Foundation On Sloping Hillside Home Learning Examples

Garage Foundation

Garage Concrete Floor Slab Construction Thickness And Cost The Constructor
Related Posts