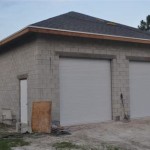
How To Build A Cinder Block Garage Foundation
A well-built foundation is crucial for any structure, and garages are no exception. Cinder blocks offer a durable and cost-effective solution for garage foundations, providing a stable base that can withstand the weight of vehicles, storage items, and the structure itself. This article outlines the steps involved in constructing a cinder block garage foundation.
Planning and Preparation: Before beginning any construction, careful planning is essential. This includes obtaining necessary permits, contacting local utility companies to mark underground lines, and having the site surveyed. Accurate measurements of the garage footprint are crucial. The plan should also consider local building codes regarding frost depth and required foundation dimensions.
Site Excavation and Leveling: The building site must be excavated to the appropriate depth, which will depend on the local frost line and the planned height of the foundation. The bottom of the excavation should be level and compacted to provide a stable base. A layer of gravel, typically 4-6 inches thick, is then spread and compacted to further improve drainage and stability. This gravel base also prevents the cinder blocks from absorbing moisture from the soil.
Formwork Construction: Wooden forms are typically constructed to define the perimeter of the foundation. These forms act as molds for the concrete footing, which will support the cinder block walls. The forms should be level, straight, and securely braced to ensure the concrete footing cures in the correct shape and size. The dimensions of the footing should comply with local building codes and the planned size of the garage.
Concrete Footing: Once the forms are in place, concrete is poured into them, creating the footing. The concrete should be reinforced with rebar to increase its strength and prevent cracking. After pouring, the concrete should be leveled and allowed to cure according to the manufacturer's recommendations. Proper curing time is critical for achieving maximum concrete strength.
Laying the First Course of Cinder Blocks: After the footing has fully cured, the first course of cinder blocks can be laid. A mortar bed is spread on the footing to provide a level surface and secure the blocks. Each block should be carefully positioned and checked for levelness and alignment. Consistent mortar joints are essential for a strong and stable wall.
Continuing Cinder Block Courses: Subsequent courses of cinder blocks are laid in a staggered pattern, ensuring that the vertical joints are offset. This pattern increases the wall's structural integrity. Mortar is applied to both the horizontal and vertical joints to bond the blocks together. A level should be used frequently to ensure the walls remain plumb and level throughout the construction process.
Reinforcement: Vertical rebar is often placed in the hollow cores of the cinder blocks at specified intervals and filled with concrete. This reinforcement adds significant strength to the walls, especially in areas prone to earthquakes or high winds. Horizontal rebar can also be added between courses to further enhance strength and stability.
Installing Anchor Bolts: Anchor bolts are embedded in the top course of cinder blocks to secure the wooden sill plate of the garage framing to the foundation. These bolts are placed at specified intervals according to the building plans. Ensuring accurate placement and proper embedment depth is critical for the secure attachment of the garage structure.
Dampproofing and Insulation: Once the cinder block walls are complete, a dampproofing membrane should be applied to the exterior surface to prevent moisture from penetrating the foundation. This membrane can be a tar-based coating or a specialized dampproofing material. Insulation can also be added to the exterior or interior of the foundation walls to improve energy efficiency.
Backfilling: After the dampproofing is complete, the excavated area around the foundation can be backfilled with soil. The backfill should be compacted in layers to prevent settling and ensure proper drainage away from the foundation. Proper backfilling is crucial for protecting the foundation from water damage and maintaining its structural integrity.
Finishing Touches: The top of the foundation wall is often capped with a concrete cap to provide a finished look and protect the cinder blocks from weathering. This cap also provides a level surface for the sill plate. Other finishing touches might include applying a parging coat to the interior or exterior of the cinder block walls for a smoother, more finished appearance.
Building a cinder block garage foundation requires careful planning, accurate measurements, and adherence to building codes. While this article provides a general overview, it is essential to consult with local building authorities and experienced professionals for specific guidance and to ensure compliance with all regulations. Proper construction techniques and attention to detail are crucial for creating a durable and long-lasting foundation for your garage.

Block Garage Foundation

Diy Concrete Foundation For A Garage Or Shed With Curb Wall

How To Build A Concrete Block Foundation Blocks Building Garage

How To Build A Concrete Block Foundation

Adding A Cinder Block Foundation To Existing The Garage Journal

Block Garage Foundation

How To Build A Concrete Block Foundation Shedplans Org

How To Build A Concrete Block Foundation

Jacking Up Concrete Block Wall The Garage Journal

Build An Off Grid Bunkhouse Garage Cellar Backwoods Home
Related Posts


