How to Build a Cinder Block Garage
Building a cinder block garage offers a durable, secure, and cost-effective storage or workspace solution. This guide outlines the process, from initial planning to wall construction, providing a comprehensive overview for DIY enthusiasts and those seeking to understand the project scope.
Planning and Preparation
Careful planning is crucial for a successful cinder block garage project. This stage involves several key steps:
- Check Local Building Codes: Research and adhere to local building codes and regulations regarding permits, setbacks, and construction requirements. This ensures compliance and avoids potential issues.
- Design and Layout: Determine the desired size and layout of the garage. Consider factors such as vehicle storage, workspace needs, and accessibility.
- Site Preparation: Clear the designated area of vegetation, debris, and obstacles. Level the ground to ensure a stable foundation.
- Material Estimation: Calculate the required number of cinder blocks, mortar, reinforcing steel, and other materials based on the design and dimensions.
Foundation Construction
A solid foundation is essential for the structural integrity of the cinder block garage. The following steps outline the foundation construction process:
- Excavation: Excavate the foundation area to the required depth according to local building codes and soil conditions.
- Footing Construction: Pour concrete footings around the perimeter of the excavated area, providing a stable base for the foundation walls.
- Foundation Wall Construction: Build foundation walls using concrete blocks, ensuring proper alignment and levelness. Reinforce the walls with rebar as needed.
- Damp-proofing: Apply a damp-proofing membrane to the exterior of the foundation walls to prevent moisture penetration.
- Backfilling: Backfill the area around the foundation walls with compacted gravel or soil, providing drainage and support.
Wall Construction
Constructing the cinder block walls requires precision and attention to detail.
- Corner Laying: Begin by laying the corner blocks, ensuring they are level and plumb. These corners serve as reference points for the remaining blocks.
- Mortar Application: Apply a consistent layer of mortar to the foundation wall and the ends of the blocks, creating a strong bond.
- Block Placement: Place the cinder blocks onto the mortar bed, aligning them with the corner blocks and ensuring level placement.
- Leveling and Alignment: Use a level and a rubber mallet to adjust the blocks and ensure they are level and plumb.
- Joint Finishing: Once the mortar has partially set, finish the joints using a jointer tool to create a clean and professional appearance.
- Reinforcement: Install horizontal reinforcement bars within the mortar joints at specified intervals to enhance wall strength.
- Lintel Installation: Install lintels above door and window openings to support the weight of the blocks above.
Door and Window Installation
Proper installation of doors and windows ensures weather tightness and security.
- Frame Installation: Install door and window frames within the designated openings, ensuring proper fit and alignment.
- Securing Frames: Secure the frames to the cinder block walls using appropriate fasteners.
- Sealing: Apply sealant around the frames to prevent air and water infiltration.
- Door and Window Placement: Install the doors and windows within the frames, ensuring proper operation and fit.
Roofing
The roofing system protects the garage and its contents from the elements. Consider various roofing options to suit your needs and budget.
- Framing: Construct the roof framing using lumber, ensuring proper support and spacing for the chosen roofing material.
- Sheathing: Install sheathing over the roof framing to provide a surface for the roofing material.
- Roofing Material Installation: Install the chosen roofing material, such as shingles, metal roofing, or tiles, according to manufacturer's instructions.
- Flashing: Install flashing around chimneys, vents, and other roof penetrations to prevent leaks.
Finishing Touches
Completing the finishing touches adds functionality and enhances the appearance of the garage.
- Electrical Wiring: Install electrical wiring for lighting and outlets, ensuring compliance with electrical codes.
- Insulation (Optional): Consider insulating the garage walls and ceiling to improve energy efficiency and temperature control.
- Interior Finishing (Optional): Apply interior finishes such as drywall or paneling as desired.
- Exterior Finishing (Optional): Apply exterior finishes such as stucco, paint, or siding to enhance the garage's appearance and protect the cinder blocks.
- Garage Door Installation :Install the garage door according to the manufacturer's directions. Ensure the door operates smoothly and safely.

How To Build A Garage Work Part 1

Block Garage Foundation

Rv Garage Plans With Concrete Block Walls 062g 0089 At Www Thegarageplan Com

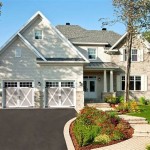
Pin By Clarity Real Estate On New House Ideas Garage Plans Cinder Block Construction

Painted Cinderblock Garage Merrypad

Adding Blocks To The Bottom Of Wood Walls Garage Journal

Build An Off Grid Bunkhouse Garage Cellar Backwoods Home

Garage Build Ideas Mig Welding Forum

Block Garage Foundation

Garages Classic Rock Face Block
Related Posts