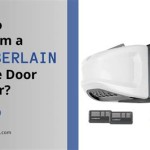
How To Reprogram A Chamberlain Liftmaster Garage Door Opener
Chamberlain and Liftmaster are leading brands in garage door opener technology, often sharing similar designs and programming protocols. Reprogramming a Chamberlain or Liftmaster garage door opener becomes necessary when the remote control or keypad stops working, after replacing batteries, or when moving into a new home to ensure security. This article provides a comprehensive guide on how to reprogram these garage door openers, covering the various methods and troubleshooting tips to ensure a successful outcome.
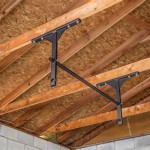
Understanding the components involved is crucial before initiating the reprogramming process. The primary components are the garage door opener unit itself, usually mounted on the ceiling of the garage; the remote control(s) used to operate the door; and sometimes, a wireless keypad installed outside the garage. The garage door opener unit houses the 'learn' button and the antenna that receives signals from the remote(s) and keypad. The remote control transmits a unique code that the garage door opener must recognize to activate the door. When a remote or keypad is reprogrammed, it is essentially teaching the garage door opener to recognize a new or previously forgotten code.
Safety precautions are paramount when working with garage door openers. Ensure the garage door area is clear of obstructions and people before attempting any programming. Always unplug the garage door opener before performing any internal maintenance or repairs. When testing the remote or keypad after programming, keep a safe distance from the moving door.
Identifying the Garage Door Opener Model
Before commencing the reprogramming process, identifying the specific model of the Chamberlain or Liftmaster garage door opener is essential. This information is typically found on a sticker located on the garage door opener unit itself. The model number dictates the specific programming procedure, as different models may have variations in button locations or programming sequences. Consulting the owner's manual for the particular model is highly recommended. If the manual is unavailable, the Chamberlain or Liftmaster website offers a wealth of information, including downloadable manuals and troubleshooting guides, identified by the model number.
The model number plays a crucial role because Chamberlain and Liftmaster have released numerous models over the years, each potentially utilizing a slightly different programming procedure. Some older models might involve dip switches, small switches within the remote control and the garage door opener unit that must be set to matching positions. Newer models, however, typically employ a 'learn' button system, which allows the remote control to transmit its code directly to the garage door opener.
Ignoring the model number and attempting to apply a generic programming procedure can lead to frustration and potential damage to the system. The correct model number unlocks access to precise instructions and diagrams, ensuring the reprogramming process is executed smoothly and effectively.
Reprogramming Using the 'Learn' Button Method
The 'learn' button method is the most common way to program Chamberlain and Liftmaster garage door openers manufactured in recent years. This method leverages a button on the garage door opener unit that allows new remotes or keypads to be registered. The 'learn' button is usually a small, colored button (often yellow, red, orange, or purple) and is generally located on the back or side of the garage door opener unit, near the antenna wire.
To begin the reprogramming process, locate the 'learn' button on the garage door opener unit. Press and release the 'learn' button. A small LED light next to the button will usually illuminate, indicating that the unit is in learning mode. This learning mode typically lasts for about 30 seconds, during which the remote control needs to transmit its code. Immediately after pressing the 'learn' button, take the remote control and press the button you wish to use to operate the garage door. Hold the button down for a few seconds until the garage door opener light flashes or the garage door starts to move slightly. This indicates that the remote control has successfully transmitted its code and the garage door opener has learned it.
In some cases, the garage door opener may require a second press of the remote control button. If the light does not flash or the door does not move after the first press, repeat the process by pressing the remote control button again. If multiple remotes need to be programmed, repeat the entire process for each remote, pressing the 'learn' button each time before programming a new remote. Once all remotes are programmed, allow the garage door opener to exit learning mode, which it will do automatically after 30 seconds, or by pressing the 'learn' button again. Test each remote to ensure it is functioning correctly and reliably opens and closes the garage door.
If the garage door opener does not respond to the remote after completing these steps, consider the following troubleshooting tips. Ensure the batteries in the remote are fresh and properly installed. Check that the antenna wire on the garage door opener unit is hanging down and not obstructed. Verify that the remote is within a reasonable range of the garage door opener. In areas with significant radio frequency interference, the range may be reduced. If problems persist, consult the Chamberlain or Liftmaster website for model-specific troubleshooting guides.
Reprogramming Garage Door Openers Using Dip Switches
Older Chamberlain and Liftmaster garage door openers often used dip switches instead of a 'learn' button. Dip switches are small, physical switches located on both the remote control and the garage door opener unit. To program these systems, the positions of the dip switches on the remote must match the positions of the dip switches on the garage door opener unit. This method is less common in modern garage door openers but understanding it is crucial for those with older systems.
The first step in reprogramming a garage door opener using dip switches is to locate the dip switches on both the remote control and the garage door opener unit. The location of the dip switches can vary, but they are often found behind a removable panel or battery cover. Once located, note the current positions of the switches on the garage door opener unit. The switches will be in one of three positions: up, down, or sometimes a middle position. Next, open the remote control and adjust the dip switches to match the exact configuration of the dip switches on the garage door opener unit. Ensure each switch is in the corresponding position.
After setting the dip switches on the remote control to match the garage door opener unit, test the remote to see if it operates the garage door. If the door does not respond, double-check the dip switch positions on both the remote and the garage door opener unit to ensure they are identical. Even a single incorrect switch position can prevent the system from working. If discrepancies are found, correct them and retest the remote.
If problems persist after carefully verifying the dip switch positions, consider the condition of the switches themselves. Over time, dip switches can become corroded or damaged, preventing them from making proper contact. Cleaning the switches with a small brush or contact cleaner may resolve this issue. Also, ensure that the batteries in the remote control are fresh and properly installed. If none of these steps resolve the problem, consider replacing the remote control or consulting a professional garage door technician.
When dealing with dip switch systems, documentation is essential. Keep a record of the dip switch settings for future reference, as these settings may be needed if the remote control is lost or damaged. Taking a photograph of the dip switch configuration can be a helpful way to preserve this information. While dip switch systems are older technology, they are generally reliable and secure when properly configured.
Troubleshooting Common Reprogramming Issues
Reprogramming a Chamberlain or Liftmaster garage door opener can sometimes present challenges. Several common issues can prevent successful reprogramming, and understanding these issues is essential for effective troubleshooting. One common problem is interference from other electronic devices. Radio frequency interference can disrupt the signal between the remote control and the garage door opener unit, preventing the unit from learning the remote's code. Try moving the garage door opener unit or the remote control away from potential sources of interference, such as fluorescent lights, wireless routers, or other electronic devices.
Another common issue is weak or dead batteries in the remote control. Ensure the batteries are fresh and properly installed. Even if the remote appears to be transmitting a signal, weak batteries may not provide sufficient power for the signal to reach the garage door opener unit. Replace the batteries with new ones and reattempt the reprogramming process.
The distance between the remote control and the garage door opener unit can also affect the reprogramming process. While some remotes have a long range, others may require closer proximity to the unit. Try standing closer to the garage door opener unit when pressing the 'learn' button and transmitting the code from the remote. If the garage door opener is located in a shielded area, such as a garage with metal siding, this can reduce the range of the remote and require closer proximity.
If the garage door opener light flashes rapidly after pressing the 'learn' button, this can indicate that the unit's memory is full. Most garage door openers can store a limited number of remote control codes. To resolve this issue, you may need to clear the unit's memory by pressing and holding the 'learn' button for an extended period, typically around 10-15 seconds, until the garage door opener light goes out. This will erase all previously programmed remotes, and you will need to reprogram all desired remotes after clearing the memory.
In some cases, the 'learn' button itself may be defective. If the garage door opener unit does not respond at all when the 'learn' button is pressed, or if the LED light does not illuminate, the button may be damaged or malfunctioning. In this situation, it may be necessary to replace the garage door opener unit or consult a professional garage door technician for repair.
Finally, ensure that there are no obstructions preventing the garage door from moving freely. If the door is stuck or encounters an obstruction during operation, the garage door opener may stop responding to prevent damage. Clear any obstructions and ensure the door moves smoothly before attempting to reprogram the remote.

How To Erase And Program Liftmaster Garage Door Remote 604 757 6557

How To Program Chamberlain Universal Mini Remote Control

How To Program A Remote For Chamberlain Liftmaster Craftsman Garage Door Opener Setup Process

How To Program A Garage Door Remote Change Battery Liftmaster Chamberlain

How To Reset A Liftmaster Garage Door Opener Quickly

How To Program A Liftmaster Garage Door Opener Remote

How To Place A Garage Door Opener Into Program Mode For Myq Setup

How To Program Liftmaster Remote Controls Doorvana Garage Doors

How To Reset A Liftmaster Garage Door Opener Quickly

How To Program Keypad For Chamberlain Liftmaster Craftsman Garage Door Opener Keyless Entry Pin
Related Posts