How To Program a Chamberlain Garage Door Opener
Programming a Chamberlain garage door opener, while seemingly complex initially, is a straightforward process when broken down into manageable steps. Understanding the necessary steps, the different programming methods, and potential troubleshooting tips will enable successful garage door opener operation. This article aims to provide a comprehensive guide on how to program a Chamberlain garage door opener, covering various scenarios and models.
The Chamberlain Group, a leading manufacturer of garage door openers, designs its products with user-friendliness in mind. However, the specific programming procedure can vary depending on the model of the garage door opener and the type of remote control or keypad being used. Before commencing any programming, it is crucial to identify the model number of the garage door opener and the remote control. This information is typically found on a label located on the garage door opener motor unit and on the back of the remote control, respectively. Identifying the model is particularly important because specific models utilize unique programming protocols. Consulting the Chamberlain website or the product manual provides model-specific instructions.
There are two primary methods for programming a Chamberlain garage door opener: learning button programming and DIP switch programming. Learning button programming is the more common method used on newer models. DIP switch programming is typically found on older or legacy garage door openers. The choice of programming method depends entirely on the type of remote control and garage door opener being used.
Learning Button Programming
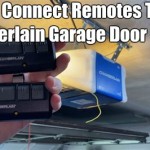
Learning button programming, also known as "learn code" programming, involves using a designated "learn" button on the garage door opener motor unit. This method is compatible with most modern Chamberlain remote controls and keypads. The following steps outline the general process for learning button programming:
Step 1: Locate the Learn Button: The learn button is typically located on the back or side of the garage door opener motor unit. It is often a colored button, usually yellow, orange, red, purple, or green. The color of the button indicates the security protocol or the type of remote control compatible with the opener. For example, a yellow learn button typically indicates compatibility with Security+ 2.0 remote controls. Refer to the garage door opener's manual for the exact location of the learn button.
Step 2: Activate the Learn Mode: Press and release the learn button on the garage door opener motor unit. A small LED indicator light near the learn button will illuminate, indicating that the opener is in learn mode. This mode typically remains active for a limited time, usually around 30 seconds, allowing sufficient time for the remote control to transmit its code.
Step 3: Transmit the Remote Control Code: Immediately after activating the learn mode, press and hold the button on the remote control that is intended to operate the garage door. Continue holding the button until the garage door opener lights flash or the motor unit emits a clicking sound. This indicates that the opener has successfully learned the remote control's code. Some models may require pressing the remote control button multiple times to successfully transmit the code.
Step 4: Test the Remote Control: After the garage door opener lights flash or the motor unit clicks, release the remote control button. Press the button on the remote control again to test if the garage door opens and closes. If the garage door does not respond, repeat the programming steps. Ensure that the remote control is within range of the garage door opener during testing.
Programming Multiple Remote Controls: To program additional remote controls, repeat the steps above for each remote. The garage door opener can typically store the codes for multiple remote controls, allowing several users to operate the door.
Programming a Keypad: Programming a Chamberlain keypad follows a similar process to programming a remote control. However, instead of a single button, the user must enter a personal identification number (PIN) on the keypad after activating the learn mode on the garage door opener. Consult the keypad's manual for the specific procedure.
DIP Switch Programming
DIP switch programming is an older method used on legacy Chamberlain garage door openers and remote controls. This method involves matching the positions of a series of small switches, known as DIP switches, on both the garage door opener motor unit and the remote control. The switches are typically numbered and can be set to one of three positions: plus (+), minus (-), or zero (0). Some DIP switches only have two positions: on and off. To program a remote control using DIP switches, the following steps are necessary:
Step 1: Locate the DIP Switches: The DIP switches are located on both the garage door opener motor unit and the remote control. On the motor unit, they are typically found under a light cover or behind a panel. On the remote control, they are usually located under the battery cover or behind a removable panel.
Step 2: Match the DIP Switch Positions: Carefully observe the position of each DIP switch on the garage door opener motor unit. Then, set the corresponding DIP switches on the remote control to the same positions. It is critical that all DIP switch positions match exactly. Using a small screwdriver or pen may be necessary to adjust the switches.
Step 3: Test the Remote Control: After matching the DIP switch positions, replace the battery cover or panel on the remote control. Press the button on the remote control to test if the garage door opens and closes. If the garage door does not respond, double-check the DIP switch positions to ensure they are identical on both the motor unit and the remote control.
Programming Multiple Remote Controls: To program additional remote controls, repeat the steps above for each remote. Ensure that the DIP switch positions on each remote control are identical to the DIP switch positions on the garage door opener motor unit.
Troubleshooting Common Programming Issues
Despite following the programming instructions carefully, issues may occasionally arise during the programming process. Addressing these issues requires systematic troubleshooting steps. Common issues and their potential solutions are outlined below:
Remote Control Not Responding: If the remote control does not respond after programming, verify that the batteries in the remote control are new and properly installed. Also, ensure that the remote control is within range of the garage door opener. Obstructions between the remote control and the motor unit can interfere with the signal. In cases of learning button programming, it may be necessary to clear the existing codes from the garage door opener's memory and repeat the programming process. This can be done by pressing and holding the learn button for an extended period, typically around 6 to 10 seconds, until the LED indicator light turns off.
Garage Door Opener Not Entering Learn Mode: If the garage door opener does not enter learn mode when the learn button is pressed, ensure that the learn button is functioning correctly. Inspect the learn button for any physical damage. If the learn button appears to be damaged, it may be necessary to replace the garage door opener motor unit. Also, verify that the power supply to the garage door opener is stable and that the unit is receiving power.
DIP Switch Mismatch: With DIP switch programming, ensure that the DIP switch positions on the remote control and the garage door opener motor unit are identical. A slight mismatch in any switch position can prevent the remote control from working. Double-check each switch position to ensure accuracy.
Security Interference: In some cases, interference from other electronic devices can disrupt the signal between the remote control and the garage door opener. Try moving the garage door opener and the remote control away from potential sources of interference, such as fluorescent lights, wireless routers, and other electronic devices. Alternatively, try programming the remote control at a different time of day, as interference can vary depending on the time.
Compatibility Issues: If a remote control is not compatible with the garage door opener, it will not be possible to program it. Consult the Chamberlain website or the product manual to verify the compatibility of the remote control with the garage door opener model. Using a Chamberlain-branded remote control specifically designed for the garage door opener model is recommended to ensure compatibility.
Blocked Safety Sensors: Chamberlain garage door openers are equipped with safety sensors that prevent the door from closing if an obstruction is detected. If the safety sensors are misaligned or blocked, the garage door opener may not respond to the remote control. Ensure that the safety sensors are properly aligned and that there are no obstructions blocking the sensor beams.
Limit Switch Issues: Limit switches control how far the garage door travels when opening and closing. If the limit switches are improperly adjusted, the garage door may not respond to the remote control or may stop prematurely. Adjusting the limit switches may be necessary to resolve the issue. Consult the garage door opener's manual for instructions on how to adjust the limit switches.
Replacing the Logic Board: If all other troubleshooting steps fail, the logic board inside the garage door opener motor unit may be faulty. The logic board controls the operation of the garage door opener and is responsible for receiving and processing signals from the remote control. Replacing the logic board may be necessary to resolve the issue. This is best left to a qualified technician familiar with garage door opener repairs.
Properly programming a Chamberlain garage door opener requires careful attention to detail and a systematic approach. By understanding the different programming methods, following the instructions closely, and troubleshooting any issues that arise, successful garage door opener operation can be achieved. Consulting the Chamberlain website or the product manual provides model-specific instructions and additional troubleshooting tips. If the above steps do not solve the programming issues, consulting a qualified garage door technician is advisable.

Programming A Chamberlain Garage Door Opener Easy Steps

Programming A Chamberlain Garage Door Opener Easy Steps

How To Program The Travel On A Chamberlain Garage Door Opener With Yellow Learn

How To Program A Remote For Chamberlain Liftmaster Craftsman Garage Door Opener Setup Process

How To Program Chamberlain Universal Mini Remote Control

Programming A Chamberlain Garage Door Opener Easy Steps

How To Reset Remote Or Keypad Access Pin For Chamberlain Liftmaster Craftsman Garage Door Opener

How To Program Chamberlain S Universal Remote Control Model Klik3u A Garage Door Opener

How To Program Keypad For Chamberlain Liftmaster Craftsman Garage Door Opener Keyless Entry Pin

B4505t Ultra Quiet Wi Fi Garage Door Opener Chamberlain
Related Posts


