How To Frame A Garage Door Into A Wall
Converting a garage door opening into a wall represents a significant structural modification. This undertaking presents homeowners with the opportunity to transform underutilized garage space into functional living areas. The process involves careful planning, adherence to building codes, and meticulous execution to ensure structural integrity and aesthetic appeal. Approaching this project without proper knowledge can lead to costly errors and potential safety hazards. This document details the necessary steps for framing a garage door into a wall, emphasizing key considerations throughout the process.
Before initiating any construction, thorough research and adherence to local building codes are paramount. Garage door conversions often require permits, and failing to obtain the necessary approvals can result in fines or mandatory rework. Contacting the local building department provides clarity on specific regulations, including structural requirements, insulation standards, and fire safety measures. These codes vary significantly depending on the location, necessitating tailored approaches to each project. Furthermore, understanding existing structural elements within the garage is crucial. Identifying load-bearing walls and their configuration informs the framing design and prevents unintended structural compromises. Neglecting this preliminary assessment can undermine the stability of the building.
Planning and Preparation: Laying the Groundwork for Success
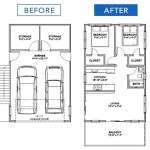
Effective planning serves as the cornerstone of any successful construction project. This phase involves several crucial steps, including measuring the garage door opening, determining the desired wall configuration, and procuring necessary materials. Accurate measurements are essential for precise framing and minimize material waste. Consider whether the new wall will be flush with the existing garage walls or recessed, as this dictates the dimensions of the lumber required. Once the measurements are finalized, a detailed framing plan can be developed, outlining the placement of studs, headers, and other structural components. This plan acts as a blueprint during the construction process, ensuring accuracy and efficiency.
Material selection plays a significant role in the structural integrity and longevity of the new wall. Pressure-treated lumber is recommended for any framing components that come into direct contact with concrete, mitigating the risk of rot and decay. The selection of stud size (e.g., 2x4, 2x6) depends on the wall height and load-bearing requirements. In most residential applications, 2x4 studs spaced 16 inches on center (OC) are sufficient for non-load-bearing walls. However, for load-bearing walls, consulting with a structural engineer is advisable to determine the appropriate stud size and spacing. The header, which spans the width of the garage door opening, requires careful consideration. Its size is determined by the width of the opening and the load it will bear. A larger opening necessitates a larger header to adequately support the weight above. Referencing a header span table, readily available online or from lumber suppliers, assists in selecting the correct header size. Securing the necessary tools is equally important. Essential tools include a circular saw, level, measuring tape, hammer, drill, impact driver, nail gun (optional), and safety glasses. Having the right tools streamlines the construction process and ensures a professional finish.
Before commencing any construction, the garage door and its operating mechanism must be completely removed. Disconnecting the power supply to the garage door opener is a critical safety precaution. The removal process involves detaching the door panels, tracks, springs, and the motor unit. Garage door springs are under considerable tension and can cause serious injury if mishandled. If unfamiliar with garage door removal procedures, seeking professional assistance is strongly recommended. Once the garage door is removed, thoroughly clean the opening, removing any debris, dirt, or loose concrete. This provides a clean surface for framing the new wall.
Framing the Wall: Constructing the Structural Framework
The framing process begins with constructing the bottom plate. Cut a pressure-treated 2x4 to the width of the garage door opening. This plate is then secured to the concrete floor using concrete anchors. Pre-drilling holes through the bottom plate before inserting the anchors simplifies the installation process. Ensuring the bottom plate is level is crucial for the overall stability of the wall. Shims can be used to compensate for any irregularities in the concrete floor. Next, construct the top plate, which is another 2x4 cut to the same length as the bottom plate. The top plate provides a secure attachment point for the wall to the existing structure above.
Installing the studs forms the vertical support for the wall. These are typically 2x4s spaced 16 inches on center. Measure and cut each stud to the appropriate length, accounting for the thickness of the top and bottom plates. Secure the studs to the top and bottom plates using nails or screws. Ensure the studs are plumb using a level, as any deviation from vertical can compromise the structural integrity of the wall. When installing the studs, remember to consider the placement of any windows or doors that will be incorporated into the wall. Framing around these openings requires additional support and careful planning. Jack studs, which are shorter studs that support the header above a window or door, are essential for distributing the load effectively.
The header, which spans the width of the garage door opening, is a critical structural component. Its purpose is to transfer the load from above to the jack studs on either side of the opening. The header should be constructed from multiple layers of lumber, typically 2x8s or 2x10s, depending on the span and load requirements. Secure the header to the jack studs using nails or screws. Ensuring the header is level and properly supported is essential for preventing sagging or structural failure. Cripple studs, which are short studs that fill the space between the header and the top plate, provide additional support and maintain consistent spacing throughout the wall. Once the framing is complete, verify that all components are securely fastened and that the wall is plumb and level.
Finishing Touches: Ensuring Structural Integrity and Weatherproofing
After the framing is completed, additional steps are necessary to ensure structural integrity and weatherproofing. Adding sheathing to the exterior of the wall provides structural support and a surface for attaching siding. Plywood or oriented strand board (OSB) are commonly used for sheathing. Secure the sheathing to the studs using nails or screws. Sealing the seams between the sheathing panels with flashing tape helps prevent water penetration.
Proper insulation is essential for energy efficiency and temperature control. Batt insulation, foam board insulation, or spray foam insulation can be used to fill the cavities between the studs. The type of insulation chosen depends on the climate and desired R-value. Ensure the insulation is installed correctly and completely fills the cavities, minimizing air gaps. A vapor barrier is typically installed over the insulation to prevent moisture from condensing within the wall. This barrier should be properly sealed to prevent moisture intrusion, which can lead to mold growth and structural damage.
Weatherproofing the exterior of the wall is crucial for protecting it from the elements. Installing siding, such as wood, vinyl, or fiber cement, provides a durable and weather-resistant surface. Applying a weather-resistant barrier behind the siding further enhances protection against moisture. Sealing any gaps or cracks around windows and doors with caulk prevents air and water infiltration. These measures ensure the long-term integrity and performance of the new wall. With the exterior weatherproofed, the interior is ready for drywall, paint, and other finishing touches, transforming the former garage door opening into a seamless extension of the home's interior.

How To Frame For A Garage Door Doors Done Right And Openers

How To Frame For A Garage Door Doors Done Right And Openers

How To Frame A Garage Door Pros Repair Service Installation

Framing A Garage Door Into Wall And Standard Size

The Portal Frame Option Jlc

Repurposing Garage Doors Into Stunning Walls With A View

Hurricane Retrofit Guide Narrow Garage Walls

Hurricane Retrofit Guide Narrow Garage Walls

How To Create A Doorway Into Garage Part1 The Skill Of Bricklaying

Garage Door Installation Electrical And Siding The Front Wall
Related Posts